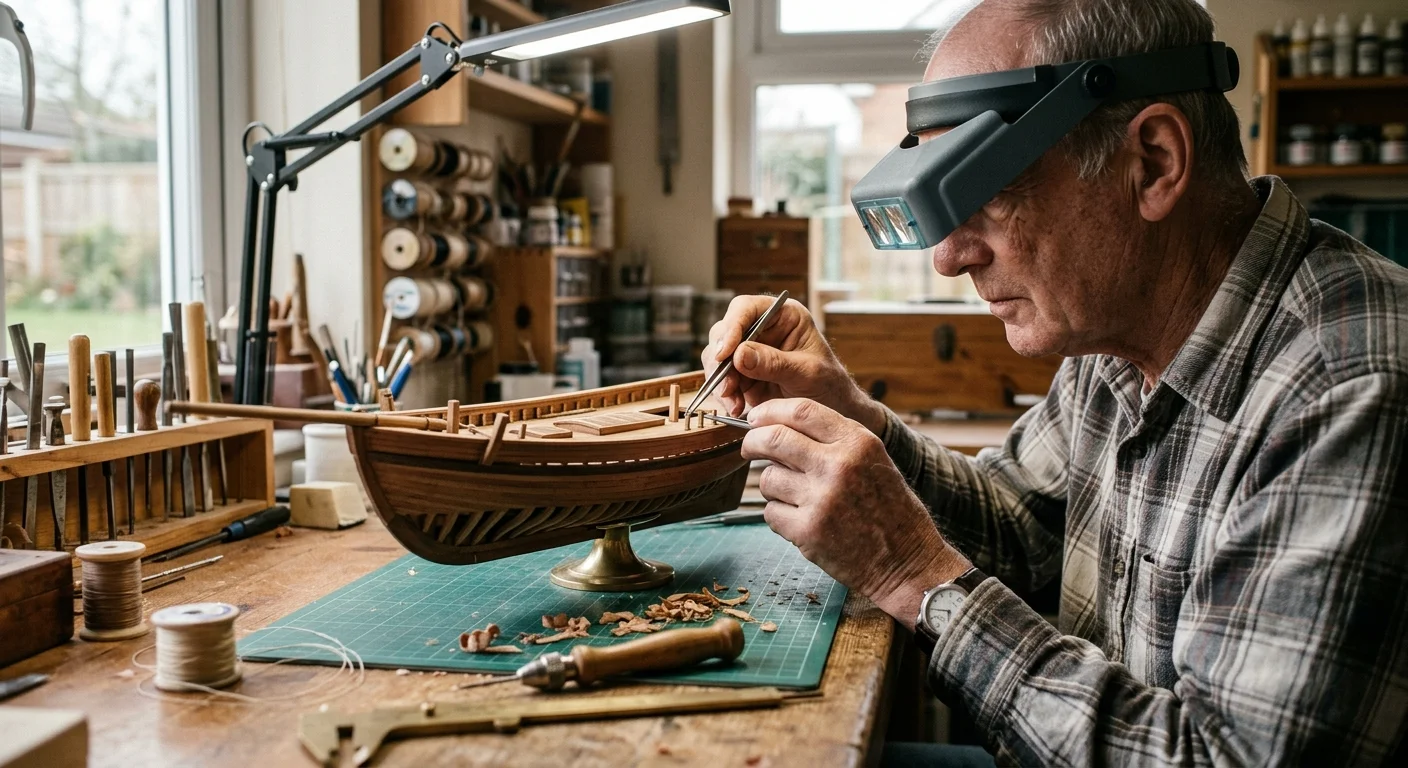
You can build museum-quality wooden ship models after cataract surgery by pairing optical head loupes with low-tension tools. Stepping away from your teaching career gives you the dedicated time to master intricate maritime craftsmanship.
Much like broader woodworking projects in retirement, model shipwrighting provides an engaging blend of patience, design, and tactile problem-solving.
Standard progressive glasses fail at the modeling bench because monofocal intraocular implants cannot shift focal depth across micro-assemblies. Calibrating an eight-inch working distance at 2.5× magnification bypasses accommodation deficits while neutralizing hand tremors.
Reclaim your workshop with the exact optical specifications, illumination metrics, and cross-locking tweezers engineered to make fine rigging blocks fall effortlessly into place.
Understanding Post-Cataract Vision at the Workbench
Cataract extraction transforms how your eyes process light and focus on fine objects. Surgeons perform between 3.6 million and 4 million cataract procedures each year across the United States.
Many retirees discover that working with their hands through tactile crafts like clay and stone sculpting offers a satisfying way to cultivate patience and creative expression.
According to clinical data compiled by the National Institute on Aging, roughly 90 to 97 percent of patients achieve 20/40 visual acuity or better following routine intraocular lens placement.
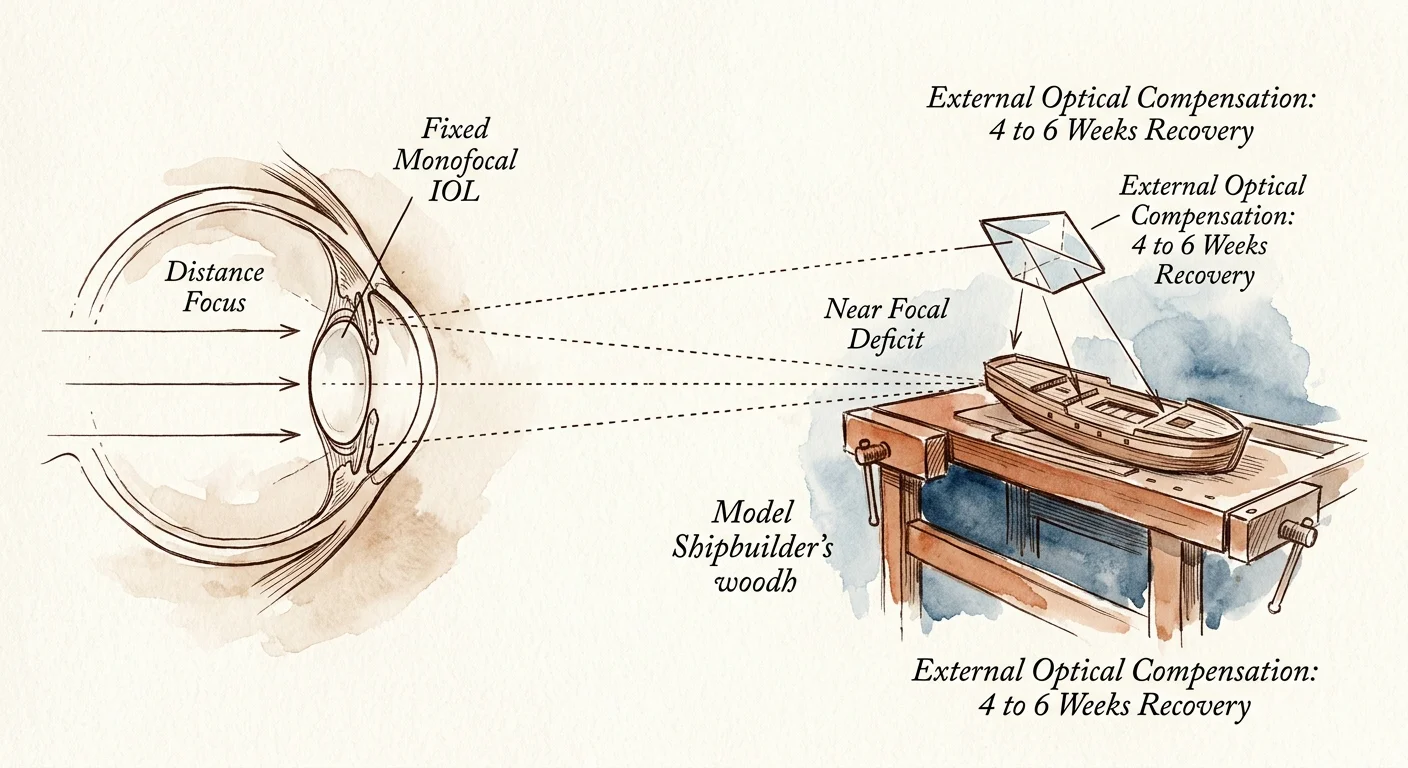
Most patients receive monofocal intraocular lenses (IOLs) calibrated for clear distance sight. These artificial implants lack the flexible crystalline structure of your youth, which means your eyes no longer accommodate dynamically between varying focal depths.
When you lean over a wooden ship hull, a single fixed distance lens leaves miniature parts blurred. You need external optical tools to bridge the gap between fixed intraocular implants and millimeter-scale workpieces.
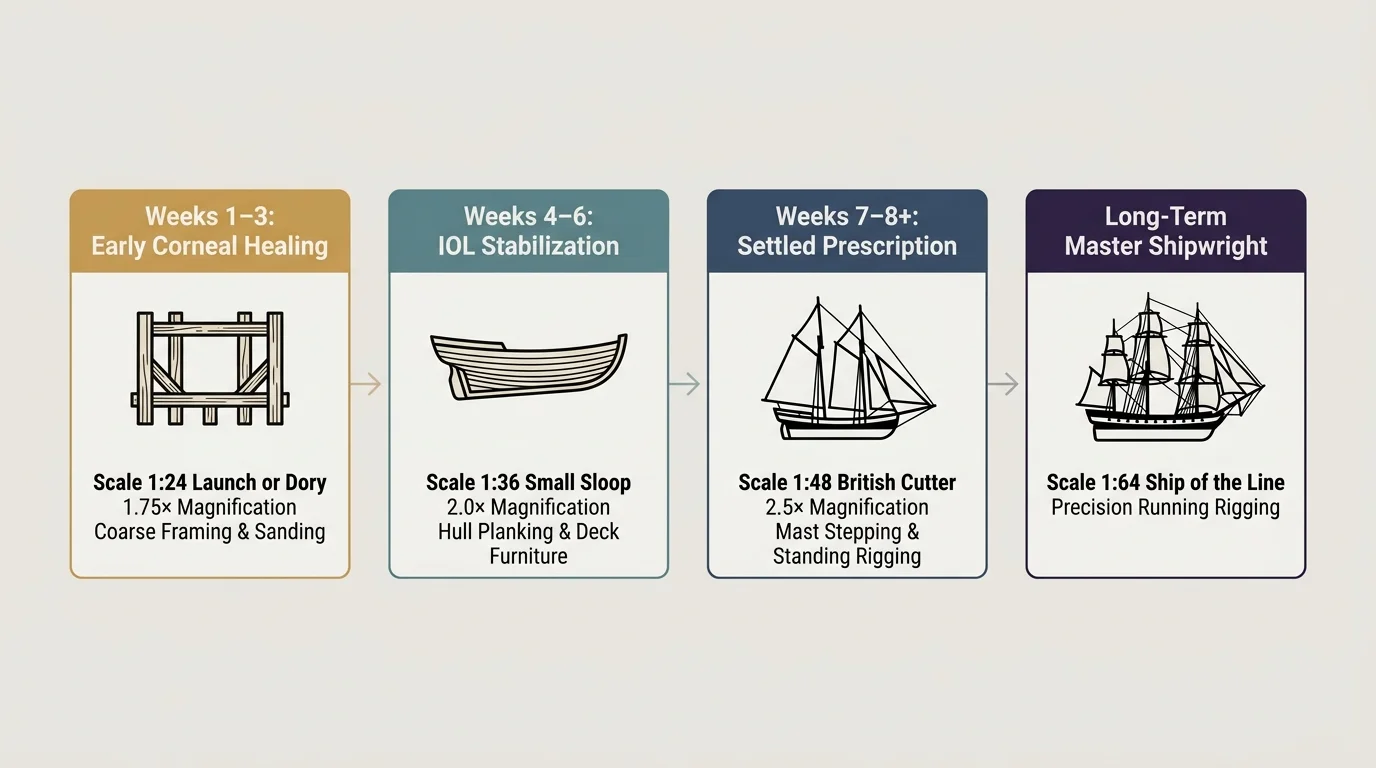
Ophthalmologists advise waiting four to six weeks, and up to eight weeks, before ordering permanent prescription eyewear. Your cornea and incision sites require this window to settle into their stable, permanent contours.
You do not have to put your craftsmanship on hold during this transition period. Selecting targeted magnification systems lets you build ship frames, sand bulkheads, and thread rigging lines comfortably right now.
Optical Calibration: Focal Lengths and Magnification Powers
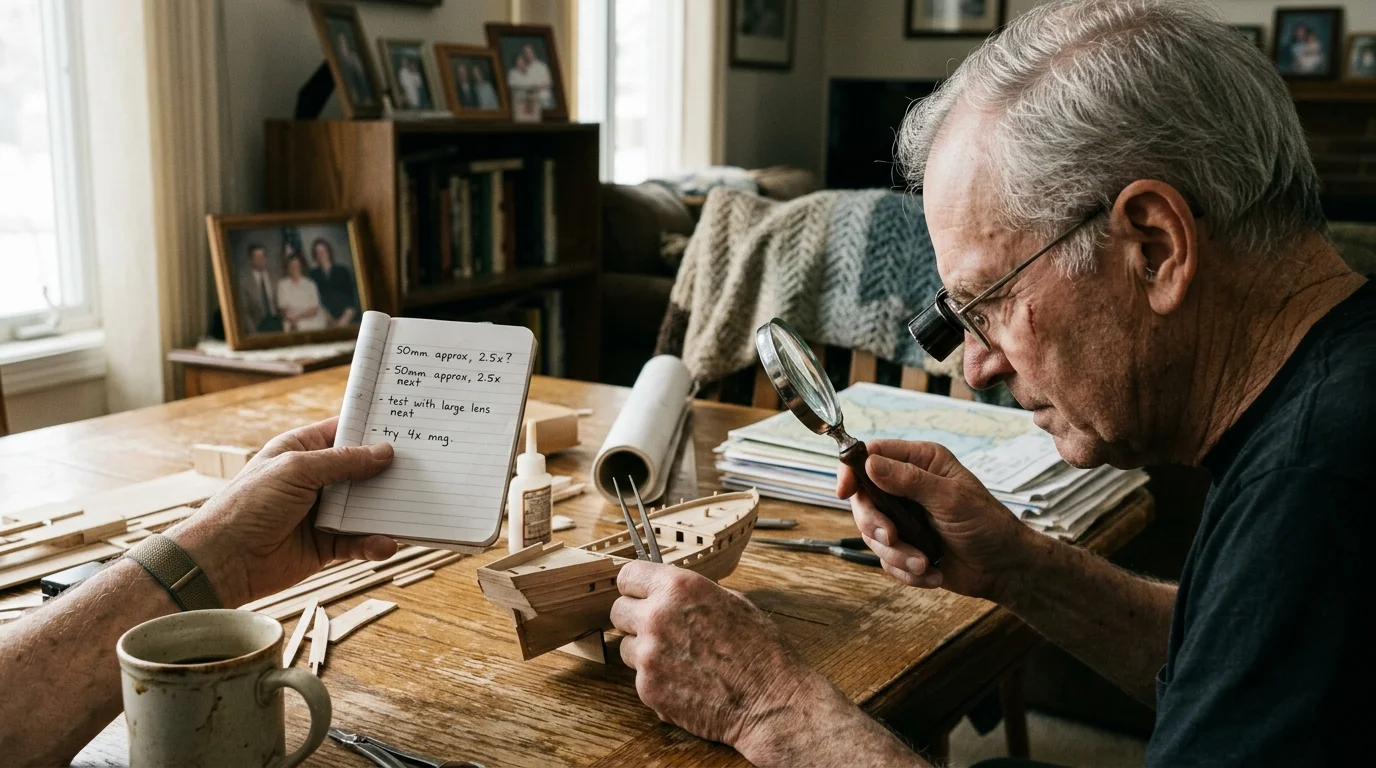
Magnification power and focal length operate in an inverse mechanical relationship. As magnification increases, your working distance decreases proportionately, pulling your posture closer to the workbench.
Understanding optical clarity and visual stabilization is equally crucial outside the shop, such as when selecting image-stabilized binoculars for pelagic birding trips.
Similar posture adaptations apply when configuring an ergonomic tabletop weaving station, where aligning working heights protects your upper back and shoulders.
Just as with bench ergonomics in Japanese hand woodworking, dialing in the right working height prevents neck strain during long crafting sessions.
Opticians measure lens curve strength in diopters, while hobbyists measure visual utility in magnification power and working distance inches. Selecting the wrong power strains your neck or crowds your hobby knives.
Industry-standard optical glass systems, such as the Donegan OptiVISOR prism series, establish clear focal parameters for bench work:
- DA-3 (1.75× Magnification): Provides a generous 14-inch working distance, ideal for cutting hull planks and shaping major frames.
- DA-4 (2.0× Magnification): Delivers a 10-inch working distance, balancing close inspection with sufficient clearance for hobby saws.
- DA-5 (2.5× Magnification): Establishes an 8-inch working distance, serving as the gold standard for miniature block seizing and eyelet reeving.
- DA-10 (3.5× Magnification): Drops your focal distance to 4 inches, which crowds hand files and restricts tool clearance.
For fine scale shipwrights, the DA-5 lens plate with 2.5× magnification provides the ideal mechanical compromise. It isolates 0.25mm lines sharply while leaving eight inches of open headroom for your fingers and tweezers.
Higher powers like 3.5× sound tempting, but they force you to bend forward excessively. Maintaining an eight-inch focal distance keeps your spine aligned and prevents neck fatigue during multi-hour modeling sessions.
Magnifier Comparison: Head Loupes Versus Swing-Arm Lamps
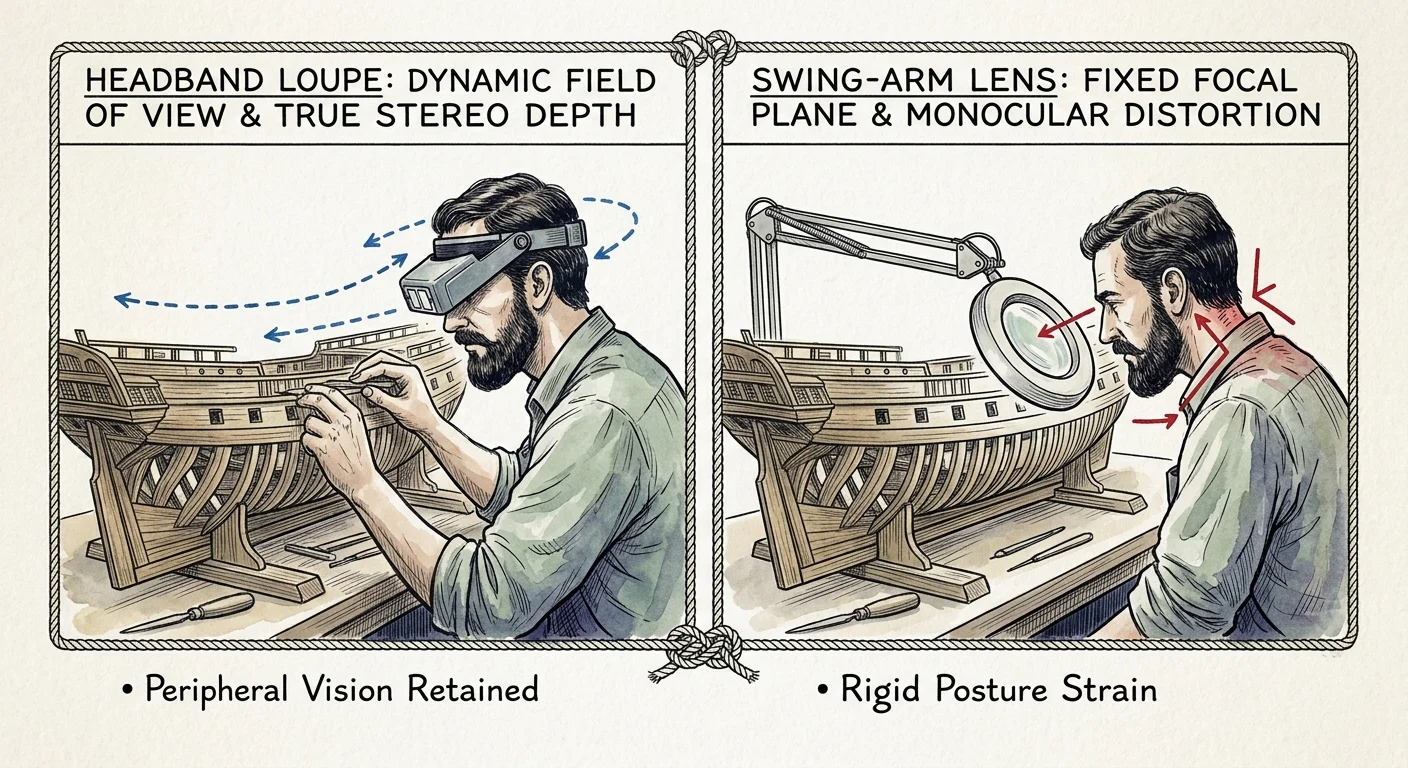
Hobbyists often choose between wearable binocular visors and illuminated desktop swing-arm lamps. Each platform solves distinct spatial challenges during wooden vessel assembly.
This close-range hand-eye precision is just as valuable when setting up a compact spare-desk linocut studio for fine relief carving.
Similar optical considerations arise when restoring antique books at home, where wearable visors leave both hands free for delicate repairs.
Headband loupes mount dual ground-glass optical lenses directly in front of your pupils. They track your head movements naturally, preserving vital stereoscopic depth perception as you position standing rigging.
Swing-arm lamps use large glass or acrylic lenses suspended above the bench on articulated counterbalanced arms. They eliminate head weight but introduce edge distortion and limit your physical tool angles.
| Magnification Device | Optical Power | Focal Working Distance | Field of View Diameter | Typical Hardware Cost | Optimal Modeling Application |
|---|---|---|---|---|---|
| Donegan OptiVISOR DA-5 | 2.50× | 8.0 inches | 3.5 inches binocular arc | $55 to $70 | Micro-rigging, block seizing, and dead-eye lanyards |
| Donegan OptiVISOR DA-3 | 1.75× | 14.0 inches | 5.2 inches binocular arc | $55 to $70 | Keel squaring, bulkhead framing, and rough planking |
| Daylight Omega 7 Pro Lamp | 2.25× (5-diopter) | 8.5 inches | 7.0 inches wide field | $180 to $240 | Plank bevel inspection, hull fairing, and airbrushing |
| Hobby Swing-Arm Lamp | 1.75× (3-diopter) | 13.0 inches | 5.0 inches central disc | $35 to $60 | General bench lighting and raw timber dimension sorting |
Binocular headband visors deliver true 3D spatial vision, which mono-lens swing-arm lamps cannot match. Threading a line through a 0.5mm hole requires depth cues that only dual-optic systems provide.
Authentic optical-grade glass headband visors retail between $55 and $70, while complete sets with interchangeable lenses run $80 to $120. Multi-lens sets allow you to adjust magnification as your projects demand finer tolerances.
Swing-arm lamps serve best as auxiliary illumination sources rather than your primary magnification tool. Combining a 5-diopter lamp with a wearable visor creates optical distortion and causes rapid eye fatigue.
Ergonomic Tool Selection: Overcoming Hand Tremor and Fatigue
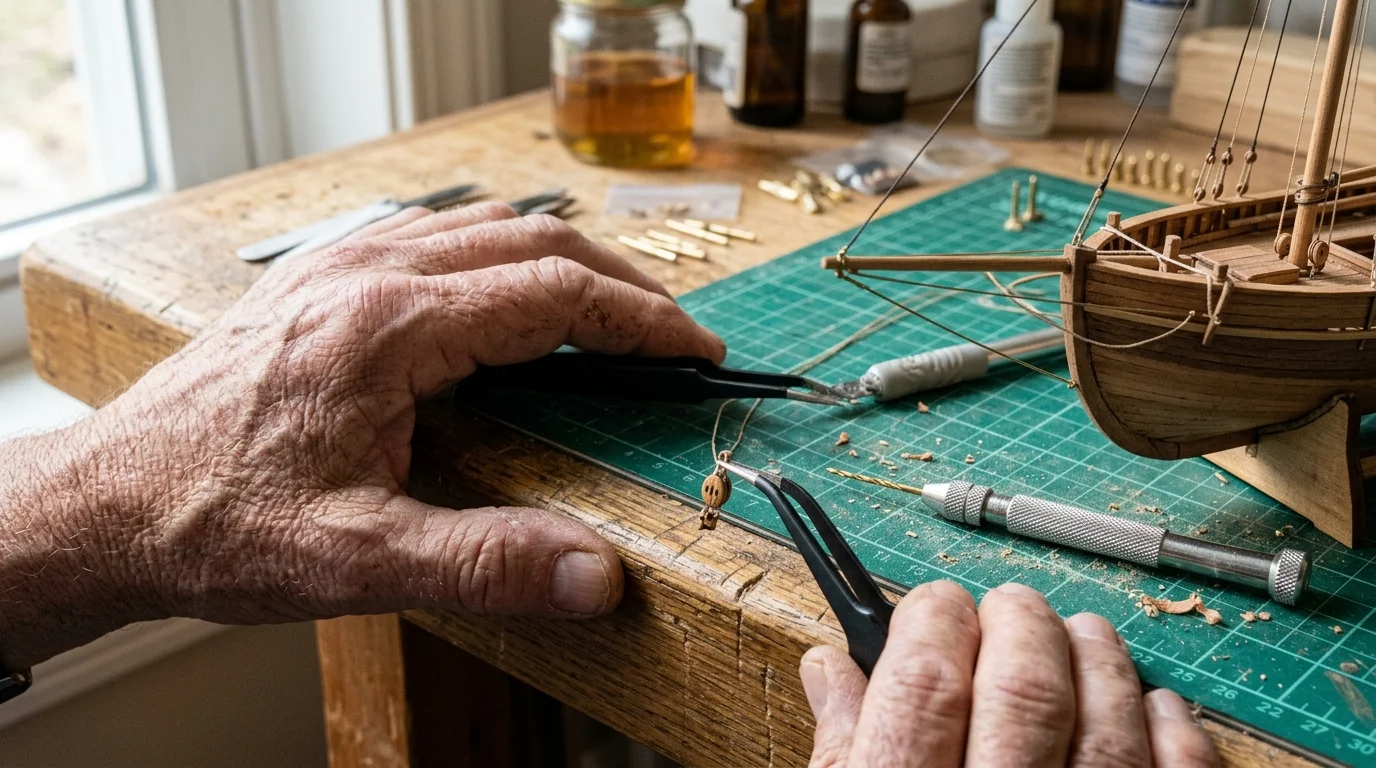
Working on micro-scale fittings frequently reveals subtle hand tremors that you never noticed during everyday life. Decades of grading papers and writing on chalkboards can also leave lingering joint stiffness in your fingers.
Developing these specialized bench techniques can even inspire you to share practical repair skills at a local community repair café.
Whether tuning fine miniature rigging or tackling a full-scale classic car restoration project, using mechanical leverage rather than raw grip strength preserves your joints.
Modifying your grip mechanics mirrors strategies used in ergonomic ceramic hand-building, where specialized instruments replace continuous pinching force.
Standard household tweezers require continuous muscular contraction to pinch small parts. This constant grip tension quickly exhausts small hand muscles, magnifying physiological tremors at the tip of your tool.
Cross-locking tweezers solve this physical challenge through reverse-action mechanics. Their internal spring keeps the tips firmly clamped shut until you actively pinch the handles to open them.
You can grasp an eyelet pin, release your finger pressure, and let the tool hold the part securely. This removes grip fatigue and eliminates dropped components.
Equip your shipwright bench with these specialized ergonomic instruments:
- Reverse-Action Cross-Lock Tweezers: Look for stainless steel models with fiber handle grips that insulate fingers and require under 50 grams of opening force.
- Bent-Nose Micro-Pliers: Choose 45-degree angled tips with internal return springs to preserve neutral wrist alignment while setting belaying pins.
- Weighted Bench Vises: Employ a ball-and-socket swiveling vise to hold assemblies securely at chest height, eliminating the need to pinch workpieces with your off hand.
- Non-Magnetic Solder Clips: Mount spring clamps onto heavy cast-iron bases to hold stays, shrouds, and mast assemblies during gluing.
Resting the heel of your hand directly on the bench base provides instant three-point mechanical stability. This simple posture trick anchors your motor control and neutralizes tremors while you thread line.
Low-tension tools turn micro-assembly from a frustrating chore into a relaxing, meditative craft. You control the pace of assembly through tool leverage rather than raw muscular force.
Workbench Lighting: Lumens, CRI, and Eliminating Glare
Following cataract surgery, your new intraocular lenses admit significantly more blue and ultraviolet light than your clouded natural lenses did. Many shipwrights report heightened glare sensitivity under unshielded shop lights.
Balanced, shadow-free illumination is equally critical when executing apartment Japanese hand-tool joinery on compact work surfaces.
At the same time, post-surgical eyes require higher contrast to distinguish dark threads against walnut hulls. You need high-intensity light delivered without reflective hotspots.
Standard fluorescent workshop tubes produce harsh micro-flicker that triggers headaches during detailed optical assembly. Modern light-emitting diodes (LEDs) provide stable, continuous illumination across your cutting mat.
Select lighting that adheres to these verified workshop parameters:
- Color Temperature (5000K to 5500K): Emits crisp, clean daylight balance that reveals true wood grain without artificial amber discoloration.
- Color Rendering Index (90+ CRI): Renders thread diameters, brass etching, and basswood stains with clean chromatic fidelity.
- Luminous Output (800 to 1200 Lumens): Delivers sufficient foot-candles across your primary assembly zone to eliminate squinting.
- Frosted Matte Diffusers: Softens beam edges to prevent blinding glints off brass cannons and polished steel tweezers.
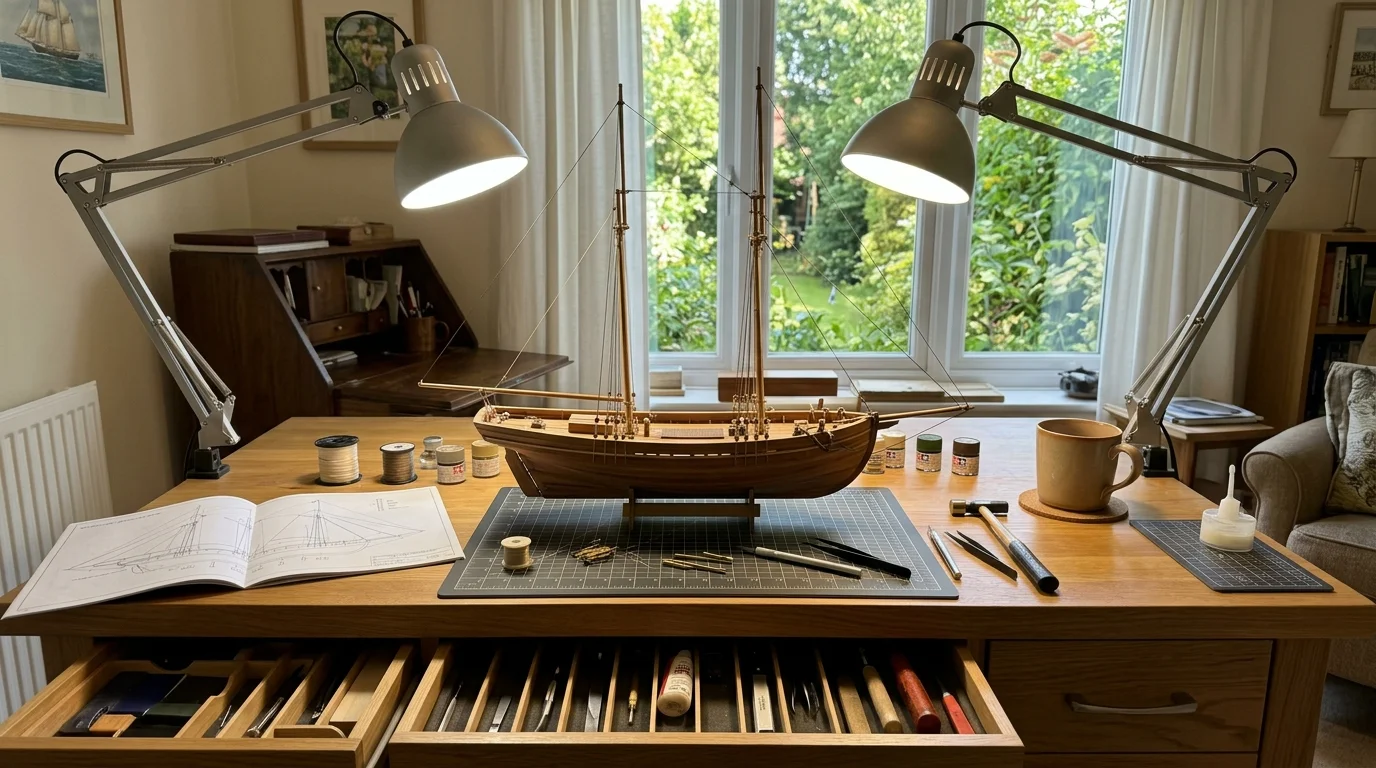
Position two separate light sources at 45-degree angles to your left and right sides. This dual-beam cross-lighting geometry cancels out cast shadows created by your own hands and tools.
Single overhead lamps cast dark shadows beneath delicate ship decks, obscuring tiny pinrails. Balanced cross-illumination reveals the smallest structural details across the entire hull profile.
Worked Example: Rigging a 1:48 Scale British Cutter Shroud
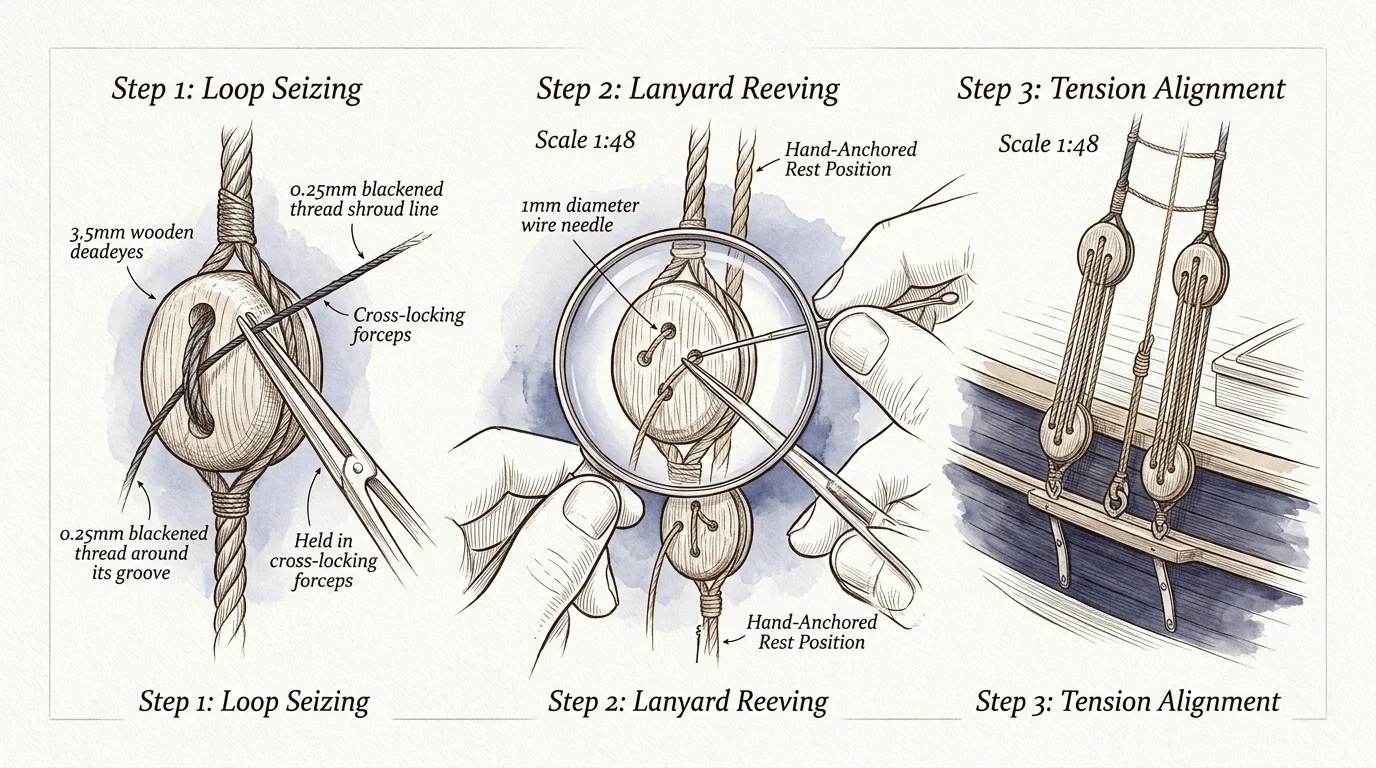
To understand how optics, lighting, and low-tension tools integrate at the bench, follow this rigging scenario. We will rig a single 3.5mm walnut deadeye on an 18th-century 1:48 scale British naval cutter.
Managing miniature rigging threads with minimal physical strain shares many techniques with ergonomic tabletop weaving.
At 1:48 scale, the shroud line measures 0.25mm in diameter, and the deadeye features three drilled holes measuring 0.5mm across. The entire deadeye assembly occupies a space smaller than a dried apple seed.
Follow these sequential steps to rig the shroud cleanly and comfortably:
- Position Bench Optics: Don an OptiVISOR fitted with a DA-5 glass lens plate (2.5× magnification) and set your eye-to-workpiece distance at exactly 8.0 inches.
- Calibrate Cross-Lighting: Position dual 800-lumen 5000K CRI-95 LED gooseneck lamps 12 inches above the cutting mat, angling them inward at 45 degrees to illuminate both faces of the deadeye.
- Secure the Deadeye: Clamp the 3.5mm walnut deadeye into a 120mm stainless steel cross-locking tweezer featuring 15-degree bent micro-tips and a 42-gram release resistance.
- Stiffen Rigging Line: Dip the tip of your 0.25mm tan polyester rigging line into water-diluted PVA glue, then shear the end at a 45-degree angle using a fresh #11 scalpel blade.
- Reeve the First Pass: Guide the stiffened 0.25mm line through the lower-left 0.5mm hole, using the tweezer’s cross-lock grip to maintain line tension without squeezing your fingers.
- Lanyard Tensioning: Thread the line through the upper matching deadeye, pulling with exactly 15 grams of tension to align the deadeye pair parallel to the sheer line.
- Lock with Micro-Adhesive: Apply a 0.3mm droplet of medium cyanoacrylate glue directly to the final knot using a fine steel wire applicator.
Executing this single assembly requires approximately twelve minutes from setup to adhesive cure. With properly calibrated 2.5× optics and cross-locking tweezers, your eyes remain relaxed and your fingers steady throughout the process.
Applying this system across all thirty shrouds on the vessel yields clean, repeatable results. Good tools replace frustration with precise, enjoyable craftsmanship.
Progressive Kit Selection: Matching Vision Recovery to Hull Scales
Selecting the right model scale lets you build confidence as your vision stabilizes. Starting with an ultra-fine 1:64 or 1:96 scale kit immediately after eye surgery often leads to unnecessary eye strain.
Research published by the Stanford Center on Longevity demonstrates that engaging in goal-oriented tactile crafts supports mental sharpness and physical wellbeing in retirement. Choosing projects that align with your healing timeline ensures continuous success.
Scale wooden kits span a wide range of component sizes, structural complexities, and assembly tolerances:
- 1:24 Scale (Large Scale): Features 3mm thick planking strips and 8mm fittings, making it ideal for the initial 4 to 8 week post-op stabilization window.
- 1:48 Scale (Medium Scale): Uses 1.5mm to 2mm planking and 3mm to 5mm blocks, providing an excellent balance of fine detail and accessible assembly.
- 1:64 Scale (Traditional Naval Scale): Demands handling 0.25mm rigging lines and sub-millimeter fittings, best reserved for stabilized vision supported by 2.5× magnification.
Beginner plank-on-frame models, such as the Shipwright Learning Series by Model Expo, retail between $25 and $50 for single hulls like the Lowell Grand Banks Dory. These kits feature pre-cut basswood parts that minimize difficult cutting operations.
Progressive three-kit skill bundles cost between $120 and $140, including introductory tools, glue, and step-by-step guidance. They guide you logically from basic hull planking up to multi-masted rigging systems.
Once your vision stabilizes and your loupe technique feels natural, you can step boldly into intricate historical builds. Your retirement offers the open runway needed to construct heirloom-grade wooden vessels with pride.
Frequently Asked Questions
How long after cataract surgery can I resume wooden ship modeling?
Most eye surgeons approve light hobby activities within 48 to 72 hours, provided you avoid rubbing your eyes or lifting heavy tools. Wait at least four to six weeks before purchasing permanent corrective lenses so your corneal shape can stabilize fully.
Why are ordinary 3.00 reading glasses inadequate for fine scale rigging?
Over-the-counter reading glasses offer single-lens focal planes that lack edge-to-edge optical clarity and stereoscopic depth cues. Optical loupes with ground glass prisms maintain natural binocular convergence, helping you align tiny lines and deadeyes accurately.
Will wearing a 2.5x magnification loupe strain my operated eye?
Optical glass loupes will not damage your eyes or dislodge an intraocular implant when calibrated to their proper eight-inch working distance. Eye strain usually results from insufficient bench lighting, glare, or hunching inside your lens focal range.
What is the best way to control hand tremors when placing tiny blocks?
Use reverse-action cross-locking tweezers to eliminate constant finger squeezing, and rest the heel of your hand firmly against the bench top. Stabilizing your wrist and forearm provides steady physical control over delicate miniature components.
Disclaimer: This article is for informational and inspirational purposes. Life decisions are deeply personal, and we encourage readers to pursue their dreams while considering their unique circumstances, health, and financial situation.