

You can weave breathtaking fiber tapestries without enduring the painful overhead reaching, heavy beating, and treadle strain of traditional floor looms.
Weaving is just one of many inspiring crafting projects for retirees that can easily be tailored around physical mobility needs.
While many fiber artists recommend continuous-strand triangle frames for wall decor, a rigid heddle tabletop loom actually protects compromised shoulders far better by confining every motion to a compact, non-elevated plane.
By setting up an ergonomic rigid heddle loom for seniors with custom tilts and narrow widths, you bypass rotator cuff strain and keep your creative retirement dreams flourishing.
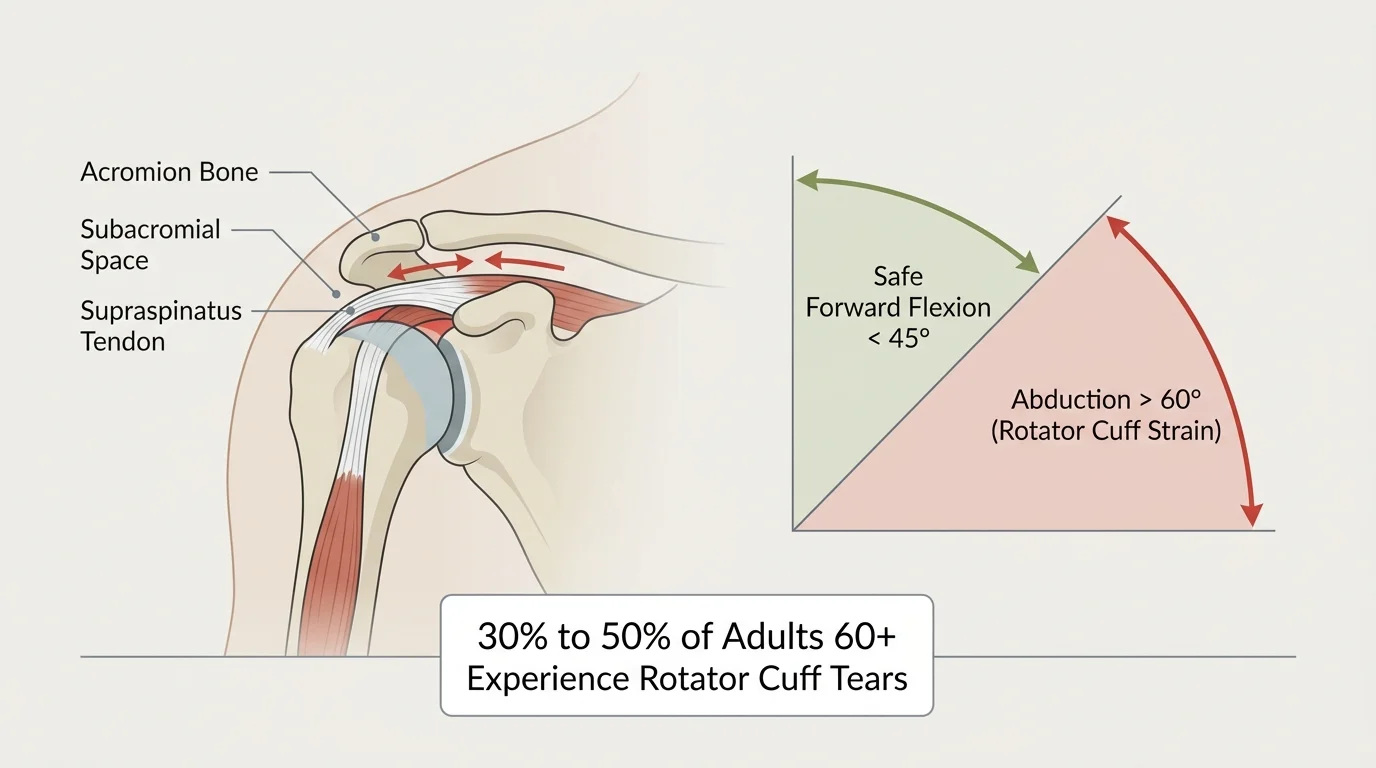
Shoulder Biomechanics and Impingement in Fiber Crafts
Shoulder impingement develops when the rotator cuff tendons become compressed beneath the acromion bone during arm elevation. Repetitive reaching and awkward angles cause inflammation, joint stiffness, and chronic crafting discomfort.
Addressing postural strain is equally critical in other textile arts, such as sewing garments for rounded posture to relieve upper back pressure.
Just as crafters modify their techniques when enjoying knitting and crochet in retirement, fiber artists must protect vulnerable joints from repetitive strain.
According to the American Academy of Orthopaedic Surgeons, approximately 2 million adults in the United States visit physicians annually for rotator cuff problems. Furthermore, clinical data shows between 30% and 50% of adults aged 60 and older experience rotator cuff tears.
The National Institute on Aging emphasizes that staying engaged in stimulating lifestyle activities supports long-term physical and cognitive vitality. Adapting your fiber arts setup allows you to continue producing art without irritating vulnerable shoulder joints.
Standard floor looms require continuous foot treadling and wide overhead arm extensions to throw long shuttles. These broad motions force your glenohumeral joint into extreme internal rotation and lateral abduction.
Understanding which specific movements aggravate subacromial impingement helps you choose tools that protect your shoulders while weaving:
- Forward flexion beyond 45 degrees, which pinches the supraspinatus tendon against the acromial arch.
- Shoulder abduction past 60 degrees when tossing wide shuttles across broad warp beams.
- Sustained overhead reaching, which cuts off blood circulation to the rotator cuff tendon insertion point.
- Forceful overhead pulling motions while beating the weft into the woven fell line.
- Static neck flexion caused by looking straight down at flat tabletop equipment for prolonged periods.
A compact tabletop weaving loom eliminates these risky movements by consolidating all weaving operations into a tight workspace. You control the craft without overworking tender muscles.
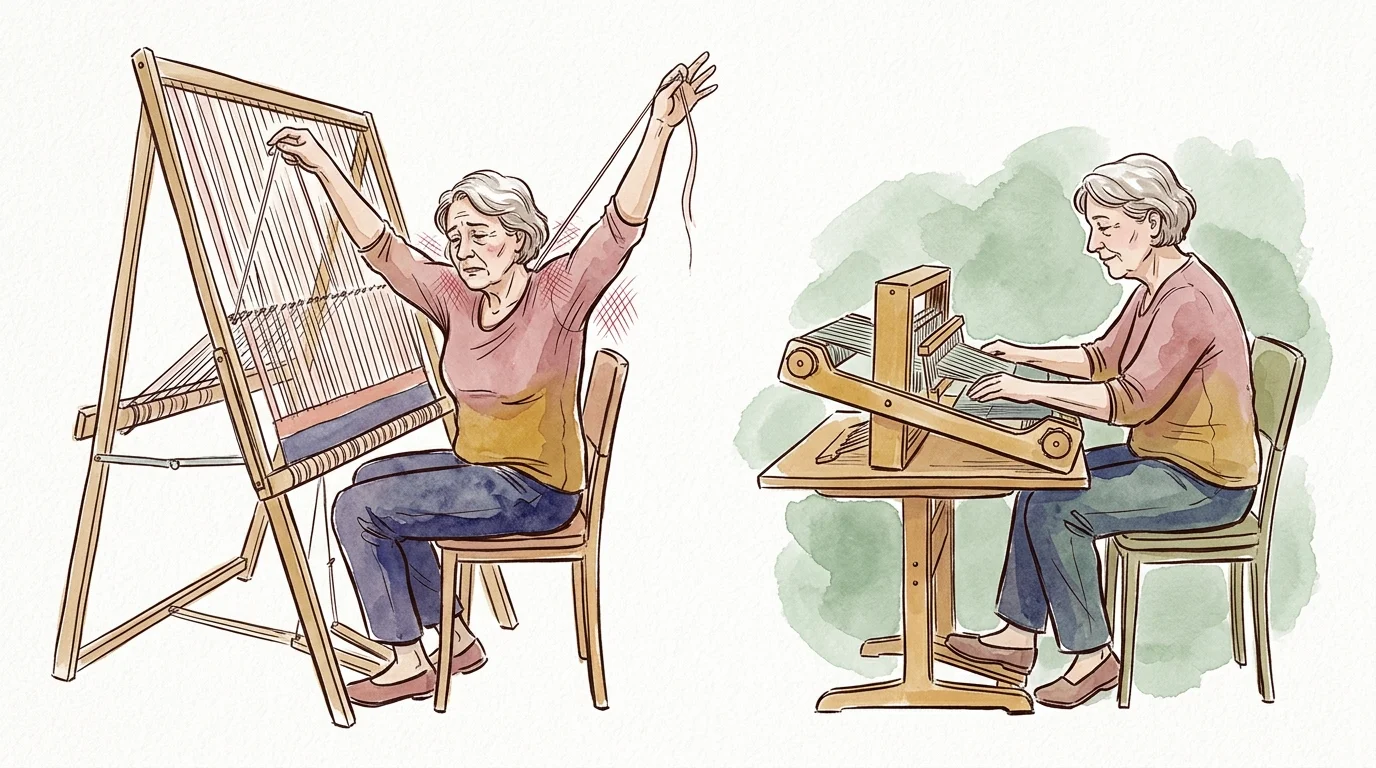
Rigid Heddle vs Continuous-Strand Triangle Frame Looms
Crafters seeking low-impact weaving often consider continuous-strand triangle looms for decorative wall hangings. However, triangle frames create hidden ergonomic hazards for anyone managing shoulder impingement.
Much like transitioning to low-strain methods in retirement quilting, selecting the right loom geometry prevents sustained upper-body fatigue.
Triangle looms require you to weave yarn continuously from corner to corner across a static geometric timber frame. As the fabric grows, you must constantly reach up toward the top apex pins.
This upward progression forces continuous arm elevation well above 90 degrees. Sustained overhead holding rapidly fatigues the deltoids and inflames the subacromial bursa.
Continuous-strand weaving also demands repeated lateral lunging across the expanding hypotenuse of the triangle. Your shoulder remains in static abduction while your fingers manipulate warp interlacings at high angles.
In contrast, a compact rigid heddle loom features mechanical warp advancement beams. You advance fresh warp forward onto the cloth beam whenever you finish a few inches of cloth.
This mechanical roller system keeps the active fell line at the exact same physical distance from your body. Your hands never need to chase the project upward or outward.
Switching shed positions on a rigid heddle requires only a gentle 4-inch vertical lift or press. This subtle motion uses forearm flexion rather than whole-arm shoulder abduction.
Beating the weft yarn into place requires only the light weight of the plastic heddle reed itself. You achieve clean, crisp weave structures using gentle wrist momentum instead of heavy shoulder drive.
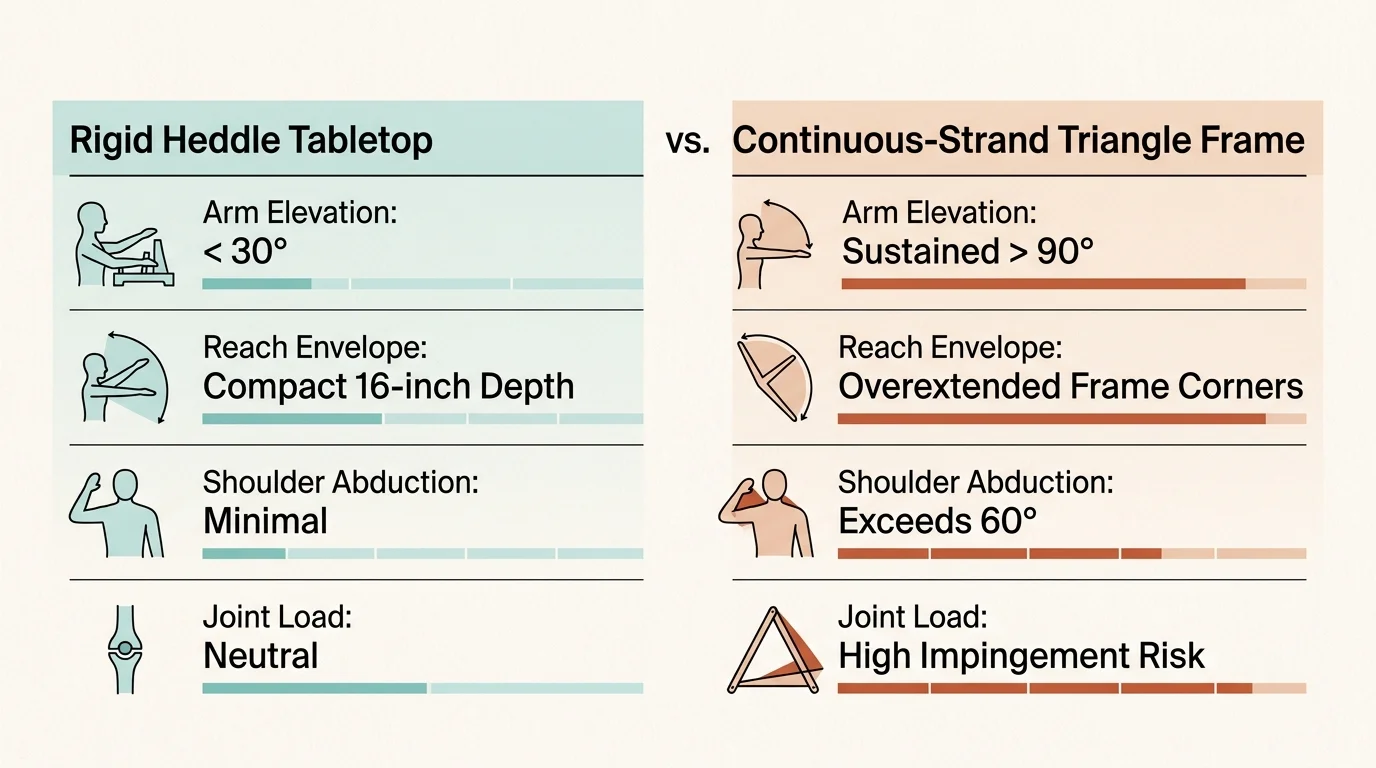
Biomechanical Comparison: Tabletop Loom vs Triangle Frame
Comparing physical dimensions and joint angles illustrates why a tabletop weaving loom protects shoulder health far better than frame setups. The following measurable metrics highlight the ergonomic differences.
Similar low-impact adaptations can be seen in Japanese hand woodworking ergonomics, where controlled torso movement replaces heavy upper-body force.
| Loom Configuration | Forward Reach Distance | Shoulder Abduction Angle | Vertical Hand Elevation | Average Beating / Placement Force |
|---|---|---|---|---|
| Ashford SampleIt 10-inch on Variable Stand | 11 to 13 inches | 15° to 20° | 0 inches (at elbow level) | 0.5 to 1.0 lb of hand pressure |
| Schacht Cricket 15-inch on 30° Table Wedge | 13 to 15 inches | 20° to 30° | 2 inches above elbow level | 0.8 to 1.2 lbs of hand pressure |
| 5-Foot Continuous-Strand Triangle Frame | 22 to 32 inches | 60° to 85° | 12 to 24 inches above shoulder level | 2.5 to 4.0 lbs of sustained arm hold |
As the data shows, triangle frames force your shoulders into extreme abduction and dangerous vertical elevation. The rigid heddle setup keeps all mechanical motions strictly within safe physical boundaries.
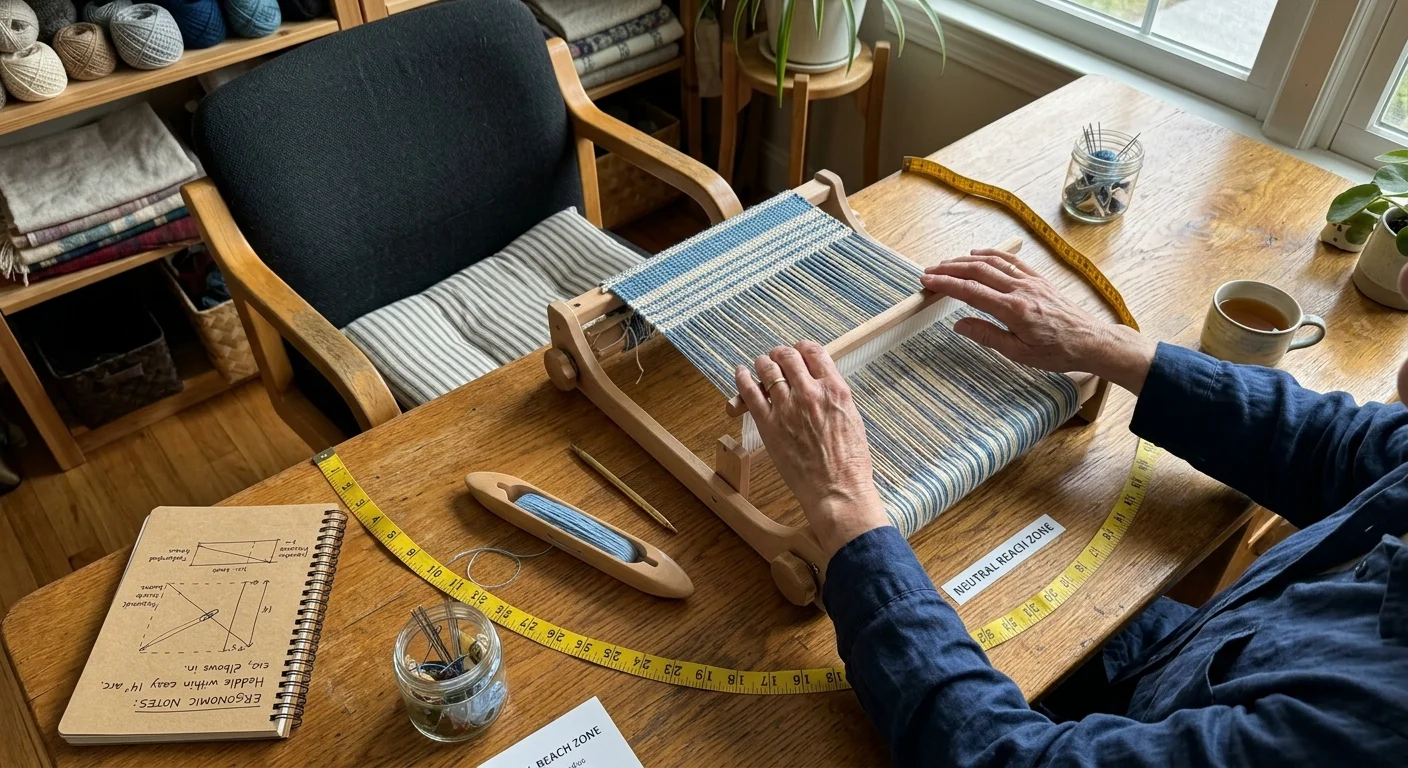
Establishing Your Neutral Reach Zone at the Loom
Workstation safety standards established by NIOSH define the primary neutral reach zone (Zone 1) as lying within 14 to 16 inches of your torso. Repetitive crafting tasks should always take place inside this boundary.
This careful spatial planning mirrors methods like open-tuning guitar setups for arthritis, ensuring joints stay within their easiest working range.
These reach-zone principles mirror techniques used in ceramic hand-building with carpal tunnel, where ergonomic positioning keeps joint strain to an absolute minimum.
Operating outside Zone 1 increases mechanical torque on your shoulder rotator cuff tendons exponentially. When you keep your hands within 14 inches, your body expends minimal energy stabilizing the joint.
Ergonomic guidelines require maintaining an elbow bend between 90° and 100° with your upper arms resting naturally beside your ribcage. Your shoulders should remain relaxed and completely un-shrugged.
Standard dining tables sit between 29 and 30 inches off the floor, which is too high for seated weaving. Placing a loom flat on a dining table forces your shoulders to hike upward to clear the sides.
Dedicated adjustable loom stands with variable tilt capabilities retail between $150 and $245. Models like the Ashford Variable Stand or Schacht Loom Stand allow custom height and angle changes.
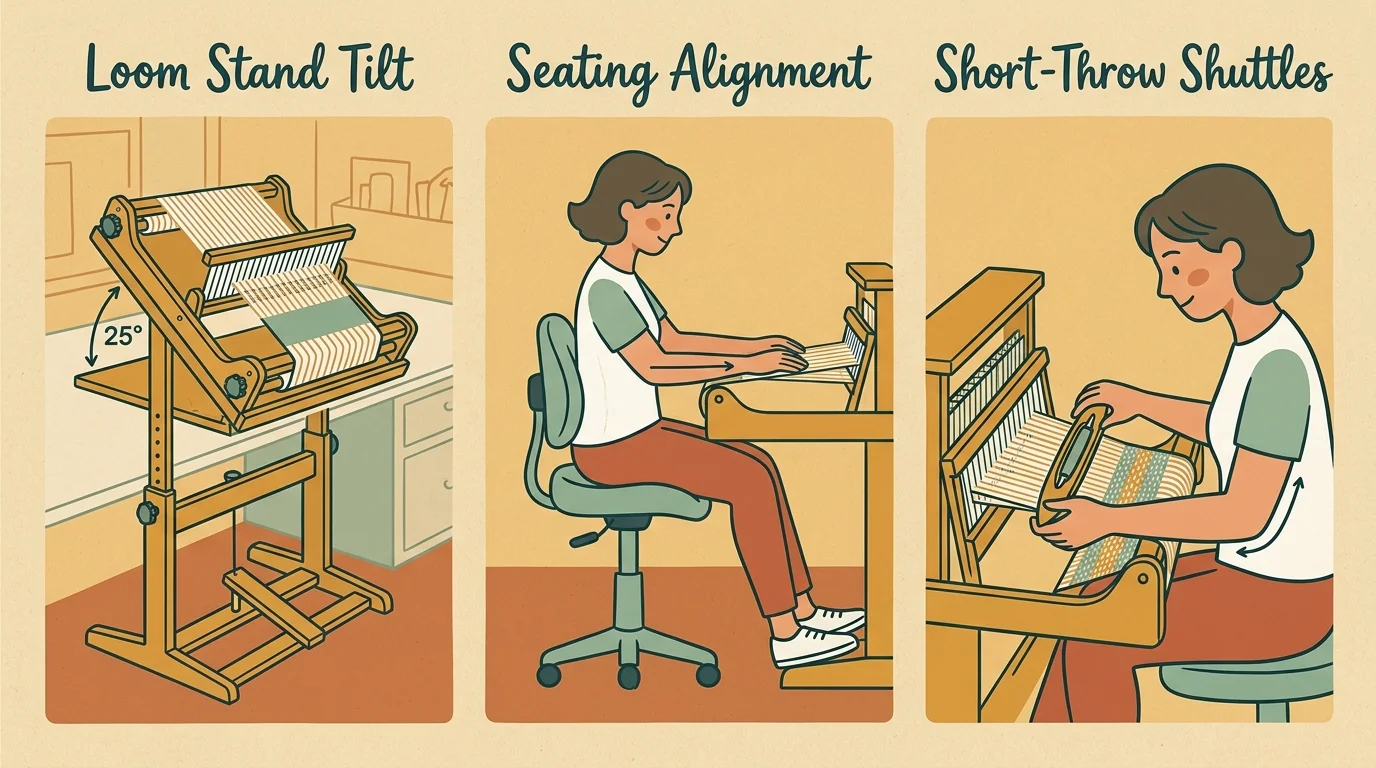
Tilting your loom upward at a 25-degree to 35-degree angle brings the warp shed closer to your natural line of sight. This elevation prevents painful forward neck bending without raising your upper arms.
If you prefer using an existing craft desk, purchase an adjustable drafting wedge or foam laptop riser. Securing your loom to an angled base lowers the front beam directly into your lap.
Step-by-Step Studio Setup for Shoulder Preservation
Applying ergonomic weaving techniques begins with arranging your studio furniture to match your body measurements. Follow this step-by-step sequence to configure your rigid heddle workspace safely:
If you enjoy compact workspaces, consider exploring kitchen table printmaking setups designed for safe and joint-friendly crafting.
Similar to establishing a compact spare-desk linocut studio, a well-planned weaving space lets you craft comfortably without requiring an expansive workroom.
- Adjust an ergonomic office chair so your feet rest completely flat on the floor with knees flexed at 90 degrees.
- Position your adjustable loom stand so the breast beam rests 1 to 2 inches below your seated elbow height.
- Tilt the loom deck upward between 25 and 35 degrees toward your chest, locking the stand knobs securely.
- Verify your neutral reach by resting your fingers on the heddle; your upper arms must touch your ribcage sides without reaching forward.
- Select a lightweight 10-inch or 12-inch stick shuttle loaded with only moderate yarn yardage to prevent heavy wrist pulling.
- Clamp your direct warping peg to a movable cart placed 14 inches from your seat, warping the loom in short seated increments.
Taking time to refine these physical dimensions protects your shoulders from cumulative micro-trauma. You will weave longer decorative pieces while enjoying total physical comfort.
Worked Studio Example: Budget, Setup, and Metrics
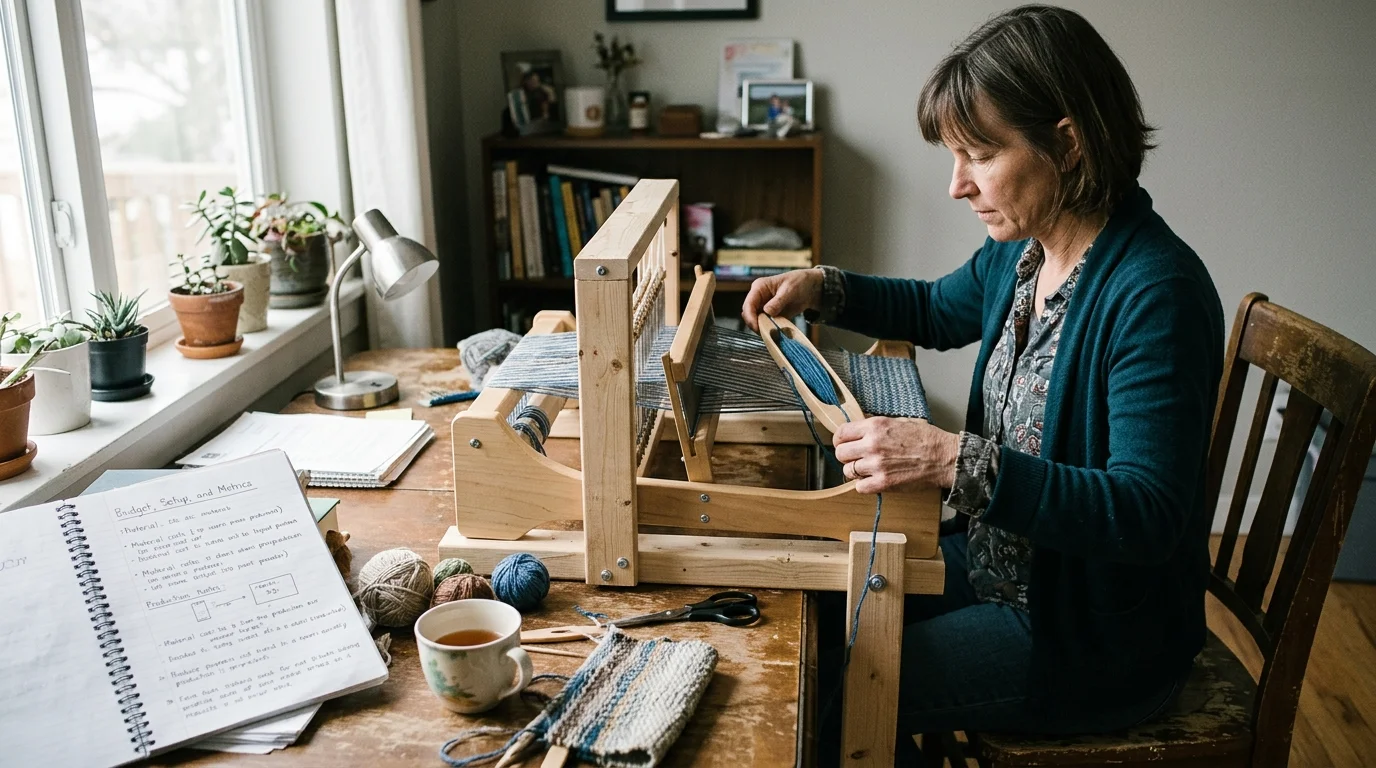
Consider the real-world scenario of Arthur, a 62-year-old retired architect managing right-shoulder subacromial impingement. Arthur wanted to weave textured wall hangings but experienced sharp shoulder pain when using a broad frame loom.
Making subtle setup modifications allows makers to find creative outlets for retirement that nurture the spirit without sacrificing physical comfort.
Once you build momentum creating woven pieces, you can explore crafting and selling your handmade tapestries online to share your work with others.
Arthur selected a 10-inch Ashford SampleIt loom retailing for $199. Its compact frame weighs under 4 pounds, allowing effortless transport between his craft room and outdoor patio.
To position the loom ergonomically, Arthur paired it with an Ashford Variable Stand priced at $185. He added two short 10-inch stick shuttles for $18, bringing his total gear investment to $402.
Arthur adjusted the stand to a 30-degree incline, setting the front beam at 27 inches from the floor. This placed the heddle exactly 12.5 inches from his sternum, comfortably within the NIOSH Zone 1 reach zone.
Before this setup, Arthur suffered acute joint inflammation after just 15 minutes of reaching across his frame loom. The wide reach forced his shoulder into 75 degrees of abduction.
With his new tabletop setup, Arthur reduced his shoulder abduction angle to a gentle 18 degrees. His vertical reach dropped from 14 inches above shoulder level down to zero.
Arthur now weaves two 45-minute sessions every day without shoulder soreness. Over three months, he completed four custom wall pieces incorporating heavy wool roving and pickup-stick textures.
Adaptive Weaving Techniques for Decorative Wall Art
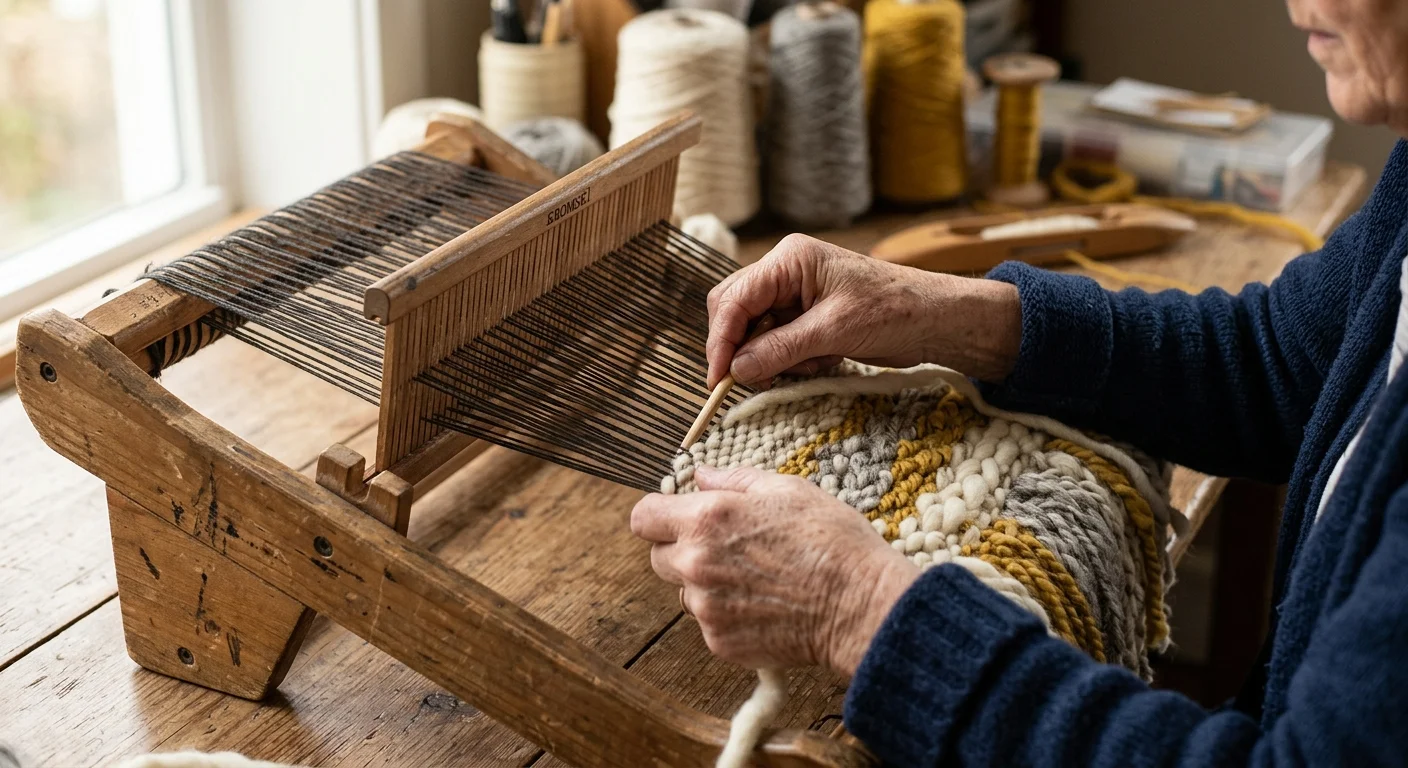
Weaving decorative wall pieces on a narrow loom requires specialized methods that produce dramatic visual texture without heavy arm labor. You can create striking tapestry effects with simple hand movements.
Adapting fiber crafts to your physical comfort is one of the best ways to explore inspiring craft projects that accommodate changing needs while stimulating creativity.
The Stanford Center on Longevity highlights how engaging in creative, purposeful design promotes resilient aging and cognitive well-being. Creative adaptation transforms physical challenges into creative mastery.
Try incorporating these low-impact weaving methods into your next decorative tapestry project:
- Clasped-weft techniques that join contrasting colors across the shed without demanding long shuttle passes.
- Pre-cut Rya knots inserted by hand directly into the open shed to form cascading fringe along the bottom edge.
- Slender pick-up sticks placed behind the heddle to create dimensional floats without manual warp thread lifting.
- Inlay techniques using soft roving bundles inserted with your fingertips directly inside your neutral zone.
- Multi-panel joining to sew multiple 10-inch woven panels together into a dramatic 30-inch wide wall hanging.
Creating your wall art in narrower panels protects your physical health and invites unique color blocking. You gain unlimited creative freedom without ever overstressing your joints.
Use short shuttles loaded with light yardage rather than heavy, oversized boat shuttles. Passing a compact shuttle across an 8-inch to 10-inch shed requires only wrist movement.
Remember to pause every 30 minutes to roll your shoulders gently backward and release tension in your neck. Gentle movement keeps synovial fluid circulating through your rotator cuff tissues.
Frequently Asked Questions
Is a 10-inch rigid heddle loom wide enough to weave large decorative wall art?
Yes, you can weave stunning wall art by joining multiple 10-inch strips with decorative whipstitching. Alternatively, hang several coordinating panels side by side from a single drift-wood branch for a modern, textured gallery appearance.
Why is a tilted stand better for shoulder pain than placing the loom flat on a table?
Laying a loom flat on a standard table forces you to lean forward and raise your shoulders to pass the shuttle. A tilted stand brings the shed directly toward your eyes, maintaining a 90-degree elbow bend and neutral shoulder posture.
How does direct warping a rigid heddle loom affect shoulder strain?
Direct warping requires walking the yarn back and forth between the loom and a peg. Clamp the warping peg at chest level close to your loom to avoid high overhead reaching and awkward twisting while threading.
Can crafters with rotator cuff repairs weave safely on a rigid heddle loom?
Yes, provided you keep the loom within your 14-inch neutral reach zone and secure medical clearance. The light beating force and minimal arm elevation make compact rigid heddle weaving one of the gentlest fiber arts available.
Disclaimer: This article is for informational and inspirational purposes. Life decisions are deeply personal, and we encourage readers to pursue their dreams while considering their unique circumstances, health, and financial situation.




1 Comment