
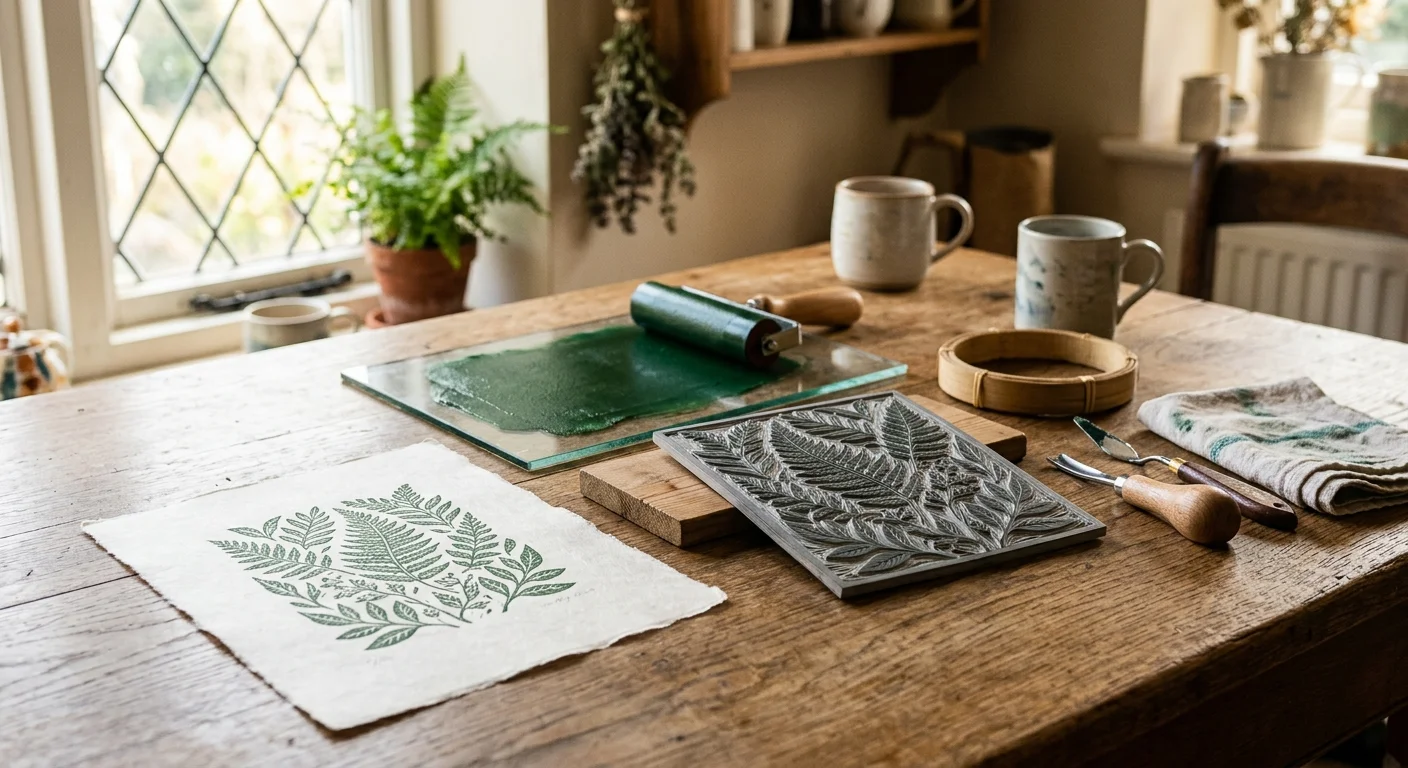
You can produce fine-art botanical prints directly from your kitchen table without purchasing an expensive cast-iron press. With safe carving techniques and non-toxic materials, relief printmaking offers an invigorating creative pursuit for your retirement years.
Developing preliminary botanical studies through retirement sketching helps you map clean outlines and negative space before ever transferring drawings onto linoleum.
Many traditional manuals claim crisp multi-color prints require commercial studio machinery and hazardous mineral spirits. In reality, combining a homemade corner registration jig with ergonomic palm guards delivers razor-sharp three-color alignment using tap-water cleanup.
This practical guide shows you how to design, carve, and burnish gallery-quality botanical prints safely in your domestic kitchen. You will master multi-block alignment and professional hand burnishing from your very first proof.
Setting Up an Ergonomic Kitchen Table Studio
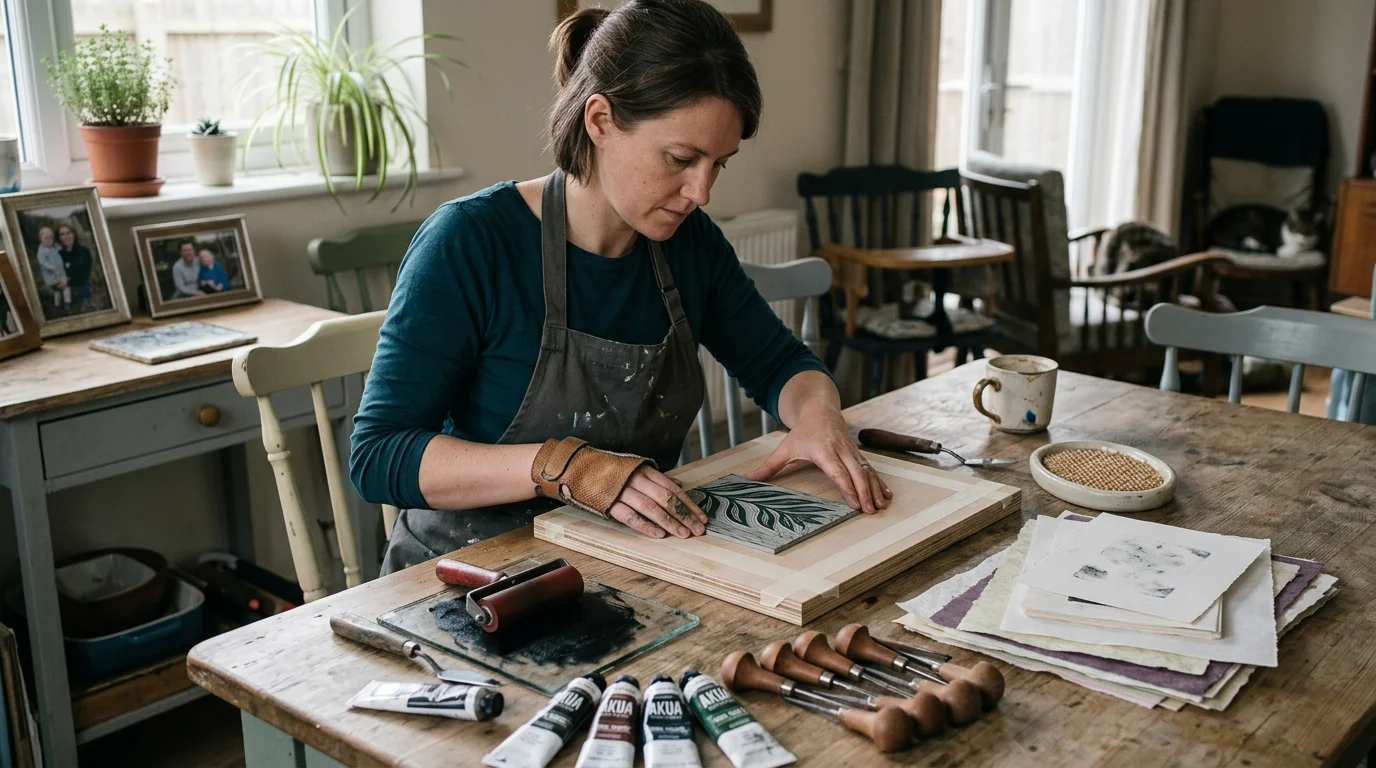
Your kitchen table provides an ideal, sturdy foundation for relief printmaking. Its stable surface supports firm downward pressure, while nearby running water simplifies cleanup.
Transitioning from corporate to creative routines often begins with setting up dedicated studio zones that separate ordinary domestic life from focused maker time.
If you are working with limited room, organizing a spare-desk printmaking studio demonstrates how little space is truly required to produce clean, professional prints.
Begin by establishing clear physical boundaries between domestic food preparation and art production. A portable, organized layout protects your furniture and keeps your workflow seamless.
Organize your table into four distinct functional zones to keep unprinted paper spotless:
- Carving Zone: A non-slip silicone mat paired with a wooden bench stop to anchor blocks firmly during cutting.
- Inking Station: A smooth 10×12 inch piece of tempered glass positioned away from unprinted sheets.
- Printing Bay: A clean, dry area dedicated solely to your registration jig, paper stacks, and baren.
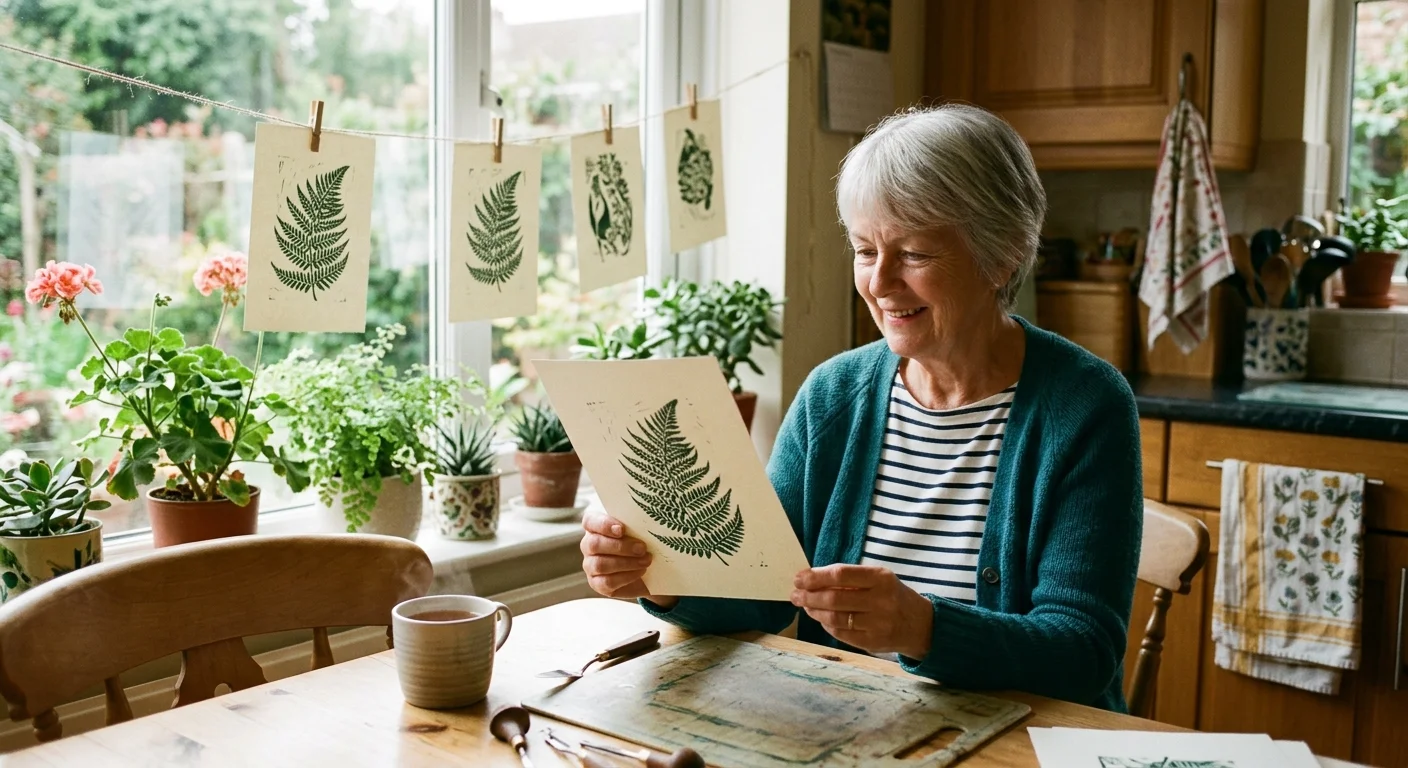
- Drying Area: A tabletop drying rack or temporary clothesline with wooden pins to cure wet prints without smudging.
Position an adjustable desk lamp with a 5000K daylight LED bulb directly above your carving zone. Low, directional raking light casts distinct shadows into your carved grooves, revealing shallow cuts before you ever ink the block.
Select a sturdy chair that keeps your elbows at a 90-degree angle to the tabletop. Proper seated height prevents neck fatigue and provides optimal leverage when burnishing impressions by hand.
Essential Safety Gear and Slip-Prevention Carving Setups
Carving linoleum requires sharp tools, making slip prevention your highest priority. Linoleum gouges cut cleanly only when razor-sharp, meaning dull tools actually increase slip hazards through excessive force.
Establishing secure, predictable cutting setups is an essential milestone in crafting a fulfilling retirement, allowing you to enjoy manual craftwork with complete peace of mind.
If you experience hand stiffness or arthritis, adopting ergonomic tools and joint-friendly techniques makes sustained creative studio sessions comfortable and fatigue-free.
Much like prioritizing posture in Japanese hand woodworking, stabilizing your materials against fixed stops protects both your fingers and your joints.
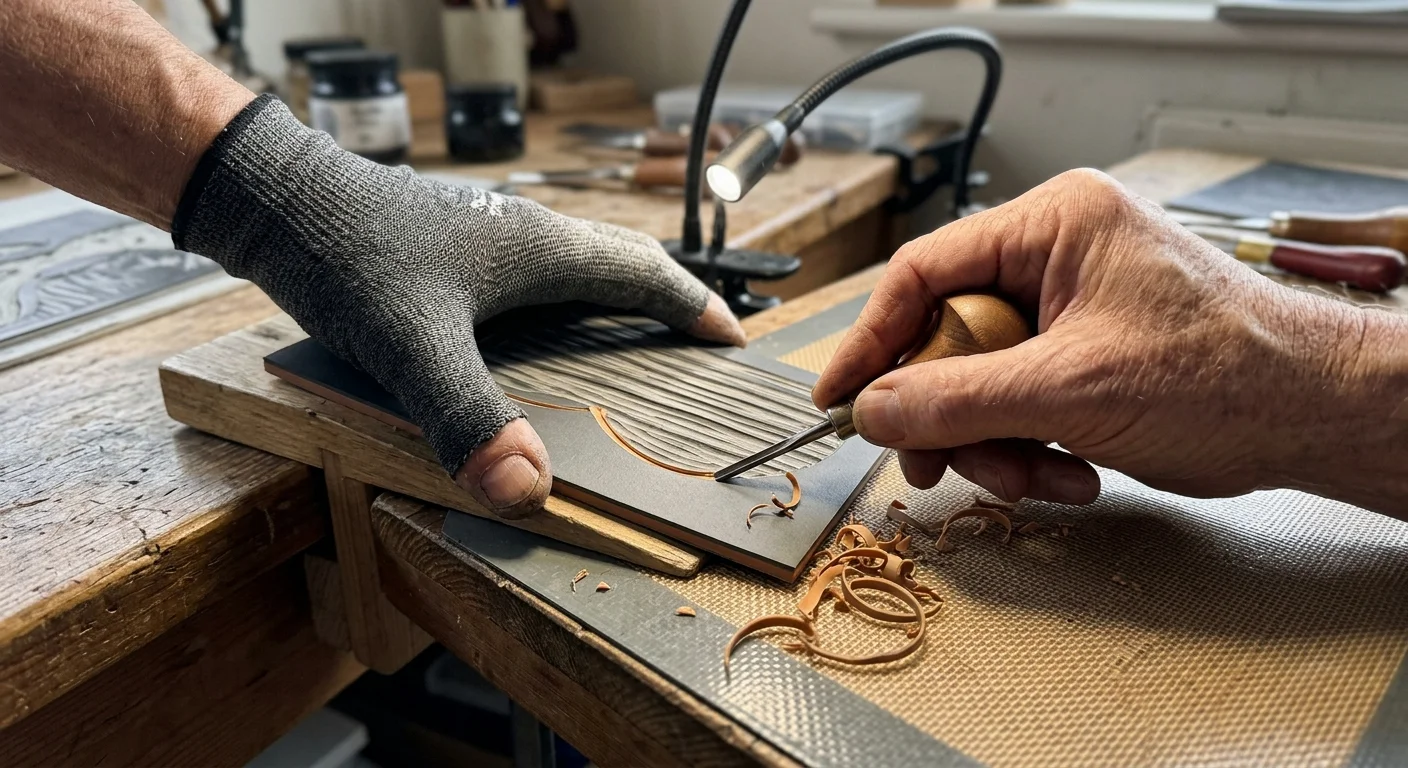
Never rely on bare hands to secure a linoleum block while carving. A sudden slip forward can cause painful punctures to the hand stabilizing the work.
Implement three core safety tools to protect your hands and stabilize your materials:
- ANSI Level 5 Cut-Resistant Glove: Wear this high-performance polyethylene glove on your non-dominant holding hand during every carving session.
- Leather Palm Guard: Slip a reinforced leather palm protector over your holding hand to shield against direct slips.
- Hardwood Bench Hook: Hook a lipped wooden stop over your table edge to brace the linoleum against forward pushing forces.
Invest in quality palm-handled carving tools, such as the Pfeil L 11/1 U-gouge and L 12/1 V-gouge. Their rounded mushroom handles nest comfortably into your palm, keeping your fingers tucked safely behind the blade.
Warm your battleship gray linoleum before cutting to reduce carving resistance significantly. Place your uncarved block beneath a low-setting electric heating pad or warm hot-water bottle for three minutes to soften the natural linseed binder.
Always carve in strokes pointed away from your body and your stabilizing hand. Turn the linoleum block on the bench hook instead of turning your wrist into an awkward, vulnerable angle.
Selecting Non-Toxic Water-Washable Relief Inks and Fine Papers
Traditional printmaking relies on solvent-based inks that demand mineral spirits or toxic turpentine for cleanup. In a domestic home environment, these fumes present health risks and leave persistent chemical odors.
Observing living specimens through backyard botanical watercolor will sharpen your appreciation for organic shapes and vein structures before you commit them to carved linoleum.
Just as painters benefit from solvent-free plein air oil rigs, printmakers can eliminate toxic thinners entirely by using water-washable oil formulations.
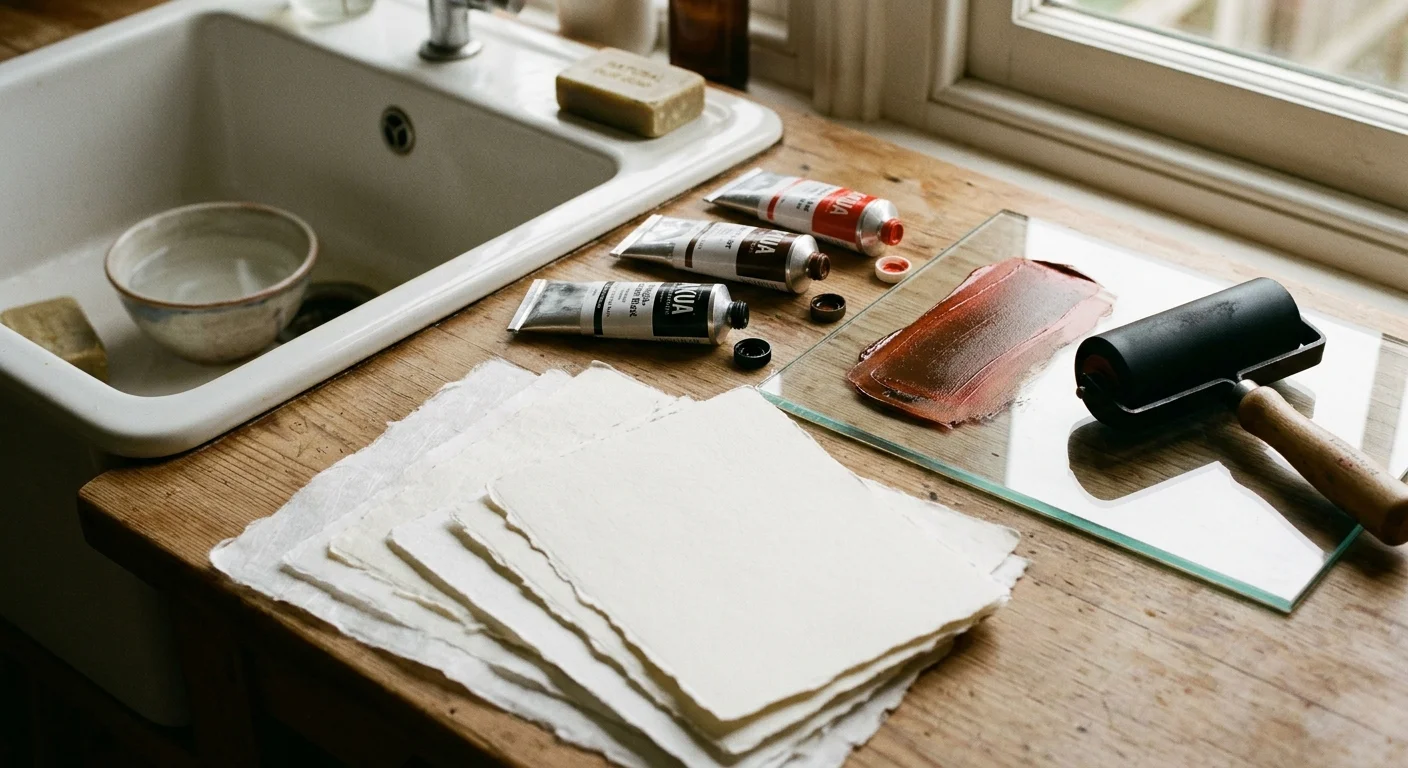
Modern water-washable oil inks solve this dilemma entirely. They combine lightfast artist-grade pigments with modified vegetable oils that wash away cleanly with standard dish soap and warm water.
Avoid cheap student-grade water-soluble inks for multi-color botanical prints. Those acrylic-based formulations dry too rapidly on the inking plate, creating sticky, uneven applications and tearing delicate fibers on your paper.
Pair your water-washable oil inks with absorbent Japanese washi papers rather than heavy Western printmaking sheets. Thick cotton rag papers require tons of pressure from a cast-iron press to draw ink from fine crevices.
Lightweight handmade papers absorb oil-based pigments effortlessly under moderate hand pressure. Look for these specific Japanese heritage papers when stocking your home studio:
- Awagami Hosho (85 gsm): A supple, strong kozo-blend sheet with a smooth surface that yields velvety, opaque solids.
- Awagami Kitakata (36 gsm): A warm, subtly green-toned paper made from gampi fiber, prized for razor-sharp botanical linework.
- Mulberry Paper (45 gsm): A durable, fibrous sheet that resists tearing during multi-layer printing passes.
These lightweight papers allow you to inspect ink transfer through the reverse side during printing. You can see precisely where additional burnishing pressure is needed before lifting the sheet.
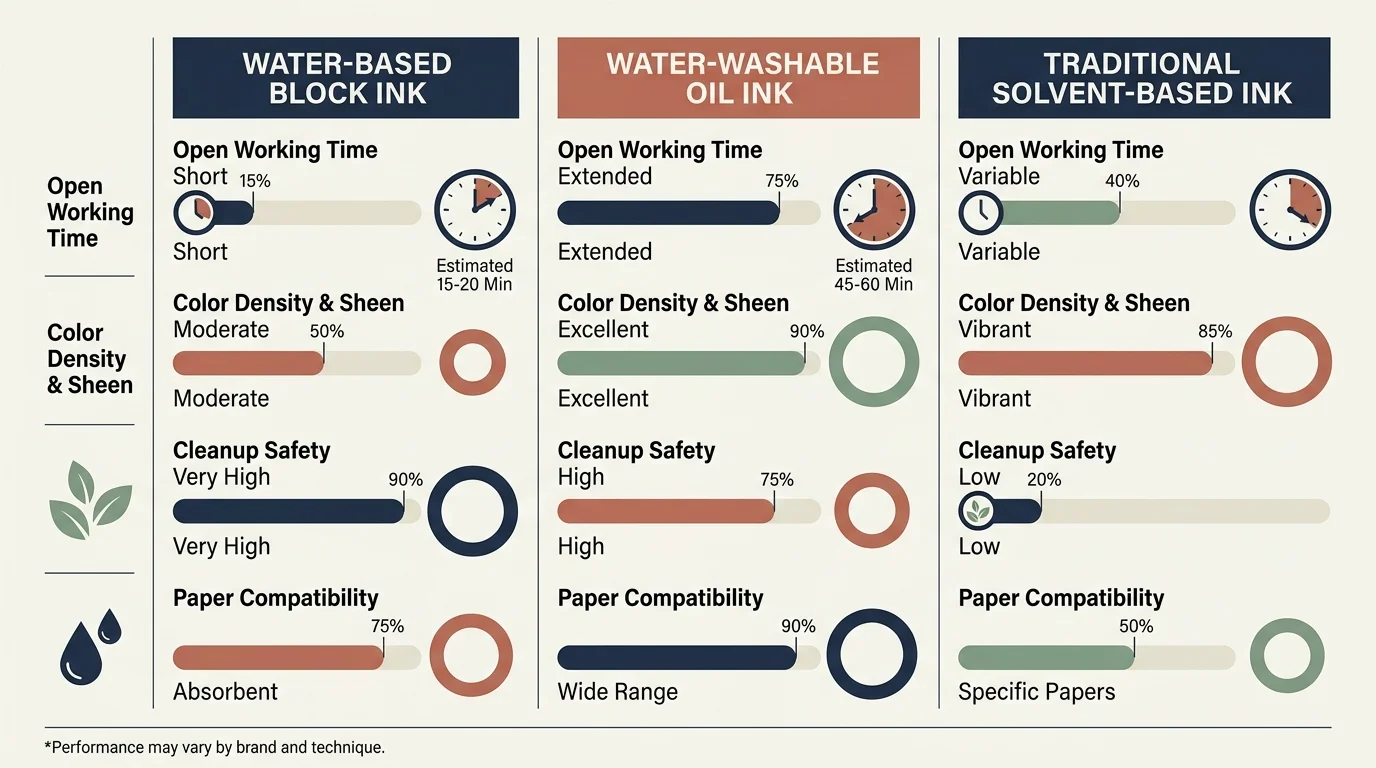
Comparing Water-Washable Inks for Home Studios
Selecting the right ink determines your open working time, color saturation, and cleanup ease. The following measurable options provide excellent performance on kitchen table setups.
Much like the pigment layering principles used when fixing muddy watercolor washes, balancing ink opacity and drying rate prevents hazy, murky overlaps across consecutive color runs.
| Ink Brand and Line | Base Vehicle | Open Working Time | Cleanup Solvent | Average Cost (75ml Tube) |
|---|---|---|---|---|
| Cranfield Caligo Safe Wash | Modified Polymerized Linseed Oil | 120 to 180 Minutes | Warm Water and Liquid Soap | $14.50 |
| Schmincke Aqua Linoprint | Natural Gum Binder Solution | 15 to 25 Minutes | Plain Tap Water | $12.75 |
| Speedball Professional Relief | Water-Miscible Oil Base | 60 to 90 Minutes | Warm Soapy Water | $11.95 |
| Charbonnel Aqua Wash | Emulsified Linseed Oil | 90 to 120 Minutes | Water and Mild Detergent | $16.20 |
Cranfield Caligo Safe Wash remains the gold standard for intricate botanical prints. Its extended open time allows you to ink multiple blocks carefully without the film drying prematurely on your roller.
Schmincke Aqua Linoprint offers exceptional convenience when speed is your primary goal. However, its fast drying time requires quick rolling and rapid registration steps to avoid patchy ink transfers.
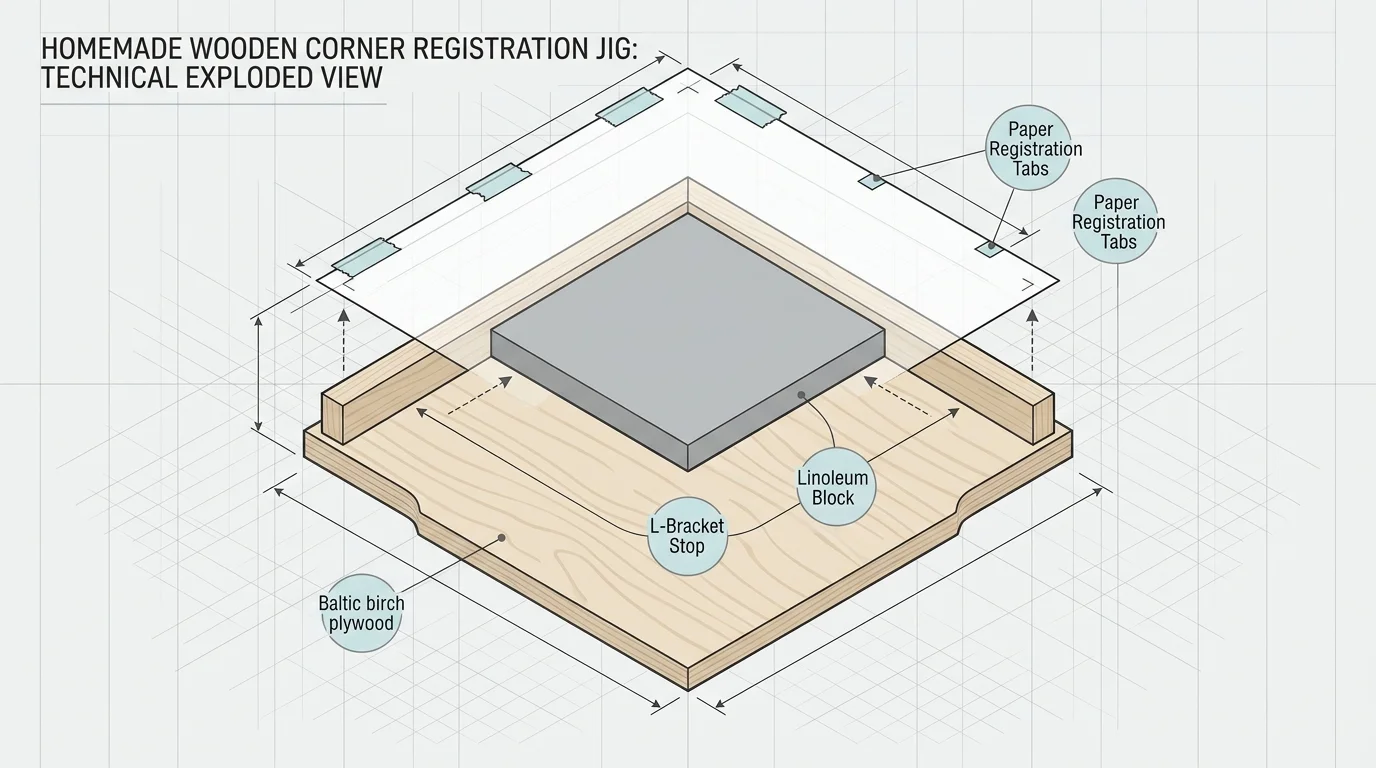
Engineering a Precision Hand-Baren Registration Jig
Multi-color printmaking requires aligning each color block perfectly with previous impressions. Professional print shops use metal registration pins, but these require punching holes into every sheet of expensive paper.
Building custom alignment aids offers a satisfying taste of retirement woodworking, demonstrating how basic carpentry techniques can enhance your art setup.
Fabricating custom studio aids shares the quiet satisfaction of apartment hand-tool woodworking, requiring only simple manual hand tools.
A homemade corner-stop registration jig eliminates paper hole-punching entirely. This simple wooden guide aligns both your carved block and your paper edges against fixed right-angle stops.
You can construct a reliable jig in thirty minutes using basic materials from your local hardware store:
- Cut a flat baseboard from 1/2-inch birch plywood measuring 12×14 inches to give yourself ample working margins.
- Glue a 1-inch-wide, 1/4-inch-thick wooden stop strip along the top edge of the board using wood glue.
- Glue a matching stop strip along the left edge, forming a precise 90-degree corner confirmed with a carpenter square.
- Secure two small interior corner brackets inside the frame to establish a fixed resting bed for your 4×6 inch linoleum block.
- Fasten two adjustable masking tape tabs along the outer top stop to mark your paper corner alignment positions.
Place your inked linoleum block firmly into the interior corner stops before every printing pass. The block cannot wiggle or shift once seated against these wooden edges.
Lower your cut paper sheet by aligning its top-left corner into the outer registration stops. This two-point alignment ensures sub-millimeter registration accuracy across every color run without expensive studio equipment.
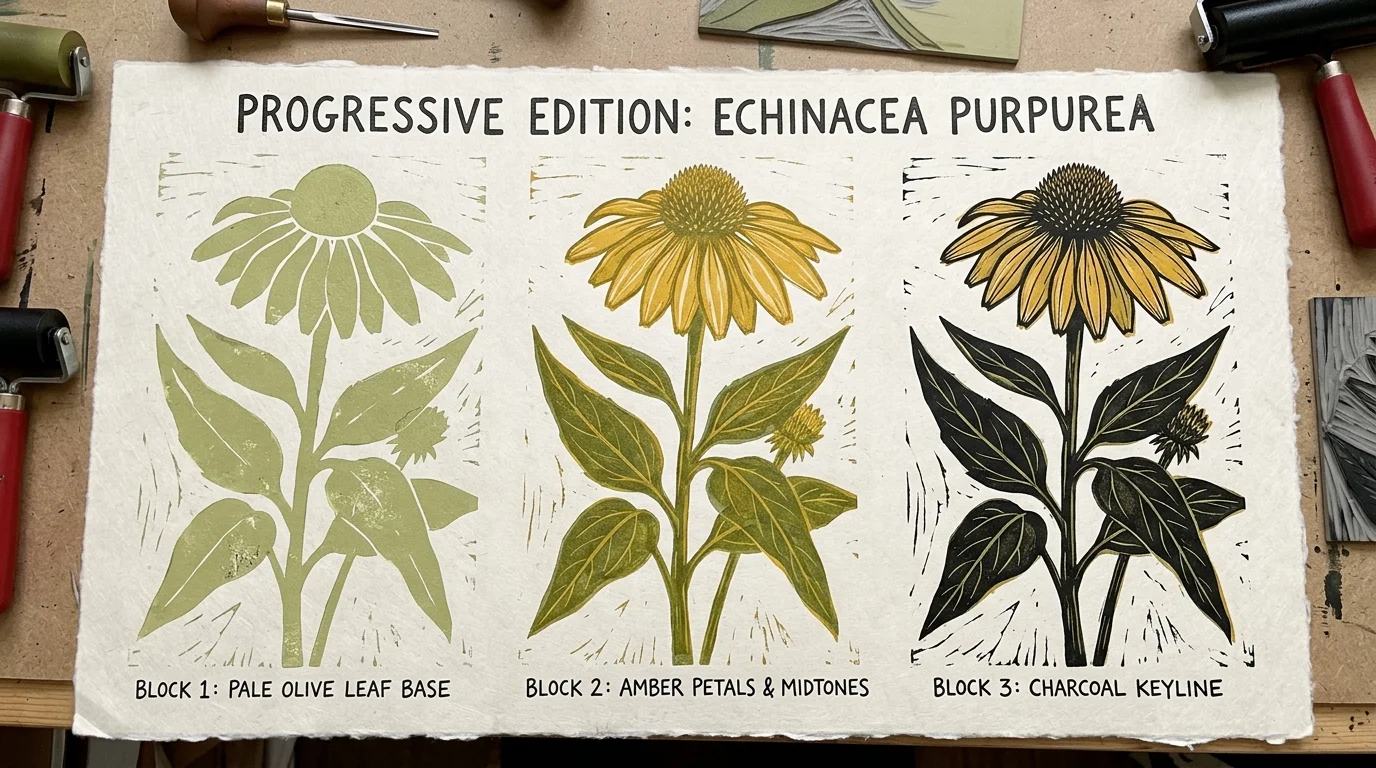
Worked Scenario: Carving and Printing a Three-Color Botanical Edition
To understand the complete process, examine this worked scenario for producing an edition of eight archival botanical prints. This project depicts a stylized Coneflower (*Echinacea purpurea*) using three separate 4×6 inch linoleum blocks.
Complementing your print practice with backyard botanical watercolor painting is an inspiring way to study plant anatomy and draft color layer separations.
Budgeting your materials carefully ensures an enjoyable, predictable creative process. Here is the exact cost and material inventory for this project edition:
- Three 4×6 inch Battleship Gray Linoleum Blocks: $14.25 ($4.75 each).
- Ten sheets of Awagami Hosho paper (trimmed to 7×9 inches): $16.50.
- Three 75ml tubes of Caligo Safe Wash Ink (Fern Green, Ochre Yellow, Raw Umber): $43.50.
- Total consumable investment for the edition: $74.25 (producing 8 finished prints and 2 test proofs).
Follow these sequential production steps to execute your multi-block botanical edition:
- Design Transfer: Trace your composite drawing onto tracing paper. Use red transfer paper to transfer the leaf stems to Block 1, flower petals to Block 2, and the seed cone to Block 3.
- Carving Block 1 (Foliage): Carve away everything except the stems and leaves using a 1mm V-gouge for outlines and a 3mm U-gouge for background clearing (45 minutes carving time).
- Carving Block 2 (Petals): Cut away all negative space around the flower petals, shallowing the outer borders to prevent stray ink pick-up (35 minutes carving time).
- Carving Block 3 (Cone Center): Stipple the textured seedhead using short, shallow jabs with your 1mm U-gouge to create organic surface depth (25 minutes carving time).
- First Color Run: Dispense 1.2 grams (a pea-sized bead) of Fern Green ink onto your glass plate. Roll the brayer until it emits a whispery hissing sound, ink Block 1, seat it in your jig, and print all ten sheets.
- Curing Interval: Allow your green impressions to dry undisturbed on your tabletop drying rack for 24 hours at normal room temperature.
- Second Color Run: Ink Block 2 with Ochre Yellow ink and register each pre-printed sheet against your jig stops. Burnish thoroughly to deposit rich petals over the dried stems.
- Final Color Run: After another 24-hour drying period, ink Block 3 with Raw Umber. Seat the block, align your sheets, and print the deep brown center to complete your edition.
By producing ten prints, you allow for two setup proofs to verify alignment. You will complete the run with eight immaculate, museum-grade floral prints ready for framing or gifting.
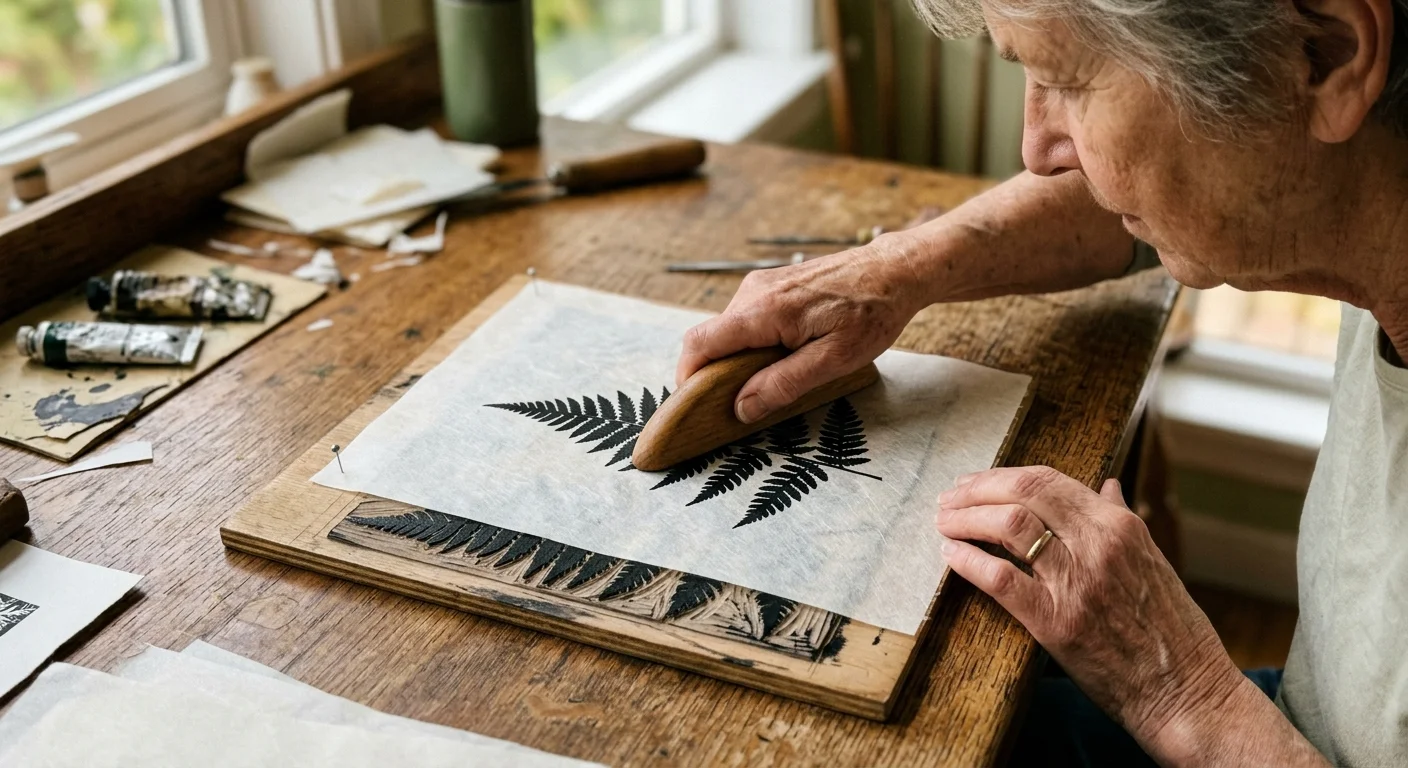
Mastering Hand Burnishing Mechanics Without a Mechanical Press
A mechanical printing press uses dual steel rollers to generate hundreds of pounds of downward force. When printing by hand, you achieve identical ink saturation by concentrating your physical energy through a handheld baren.
A traditional Japanese baren consists of a coiled bamboo core backed by layered paper and wrapped in a twisted bamboo leaf. The textured ribs of the bamboo leaf focus your arm pressure into tiny contact points across the paper surface.
Apply these specific burnishing habits to ensure uniform pigment transfer without tearing delicate washi:
- Backing Sheet Protection: Place a smooth sheet of lightweight tracing paper or baking parchment over your printing paper to shield it from friction.
- Circular Stroke Pattern: Move your baren in tight, overlapping spirals starting from the center of the block and working toward the outer edges.
- Shoulder Leverage: Lock your wrist at a neutral angle and lean your upper body weight into the baren rather than straining your arm muscles.
- Edge Burnishing: Use the smooth back of a wooden kitchen spoon to rub stubborn fine lines or deep borders along the edge of your design.
Perform the registration peek test before lifting your finished print completely from the block. Hold the paper firmly against your registration stops with one hand, lift the opposite corner, and inspect the impression.
If an area appears faint or spotty, gently lower the corner back into position. Reapply focused circular pressure with your baren until the pigment transfers completely.
Creative Vitality, Fine Motor Control, and Lifelong Learning
Retirement offers you the freedom to engage in deliberate, immersive crafts that challenge and reward your intellect. Linocut printmaking unites tactile handcraft with analytical planning, stimulating both hemispheres of your brain.
The controlled, precise movements required for linoleum carving promote hand-eye coordination and fine motor strength. Research shared by the National Institute on Aging highlights how engaging in cognitively demanding creative tasks supports mental sharpness and neural vitality as you grow older.
“It is never too late to be what you might have been.” — George Eliot
Printmaking also introduces you to supportive communities of like-minded makers who value patient craftsmanship. Educational networks like Osher Lifelong Learning offer inspiring spaces where older adults gather to explore artistic techniques and share their creative journeys.
Carving a botanical edition encourages you to slow down and observe natural forms with fresh, observant eyes. You transform wild garden perennials into graphic art, building tangible legacies that celebrate your creative boldness.
Troubleshooting Common Kitchen Table Printing Glitches
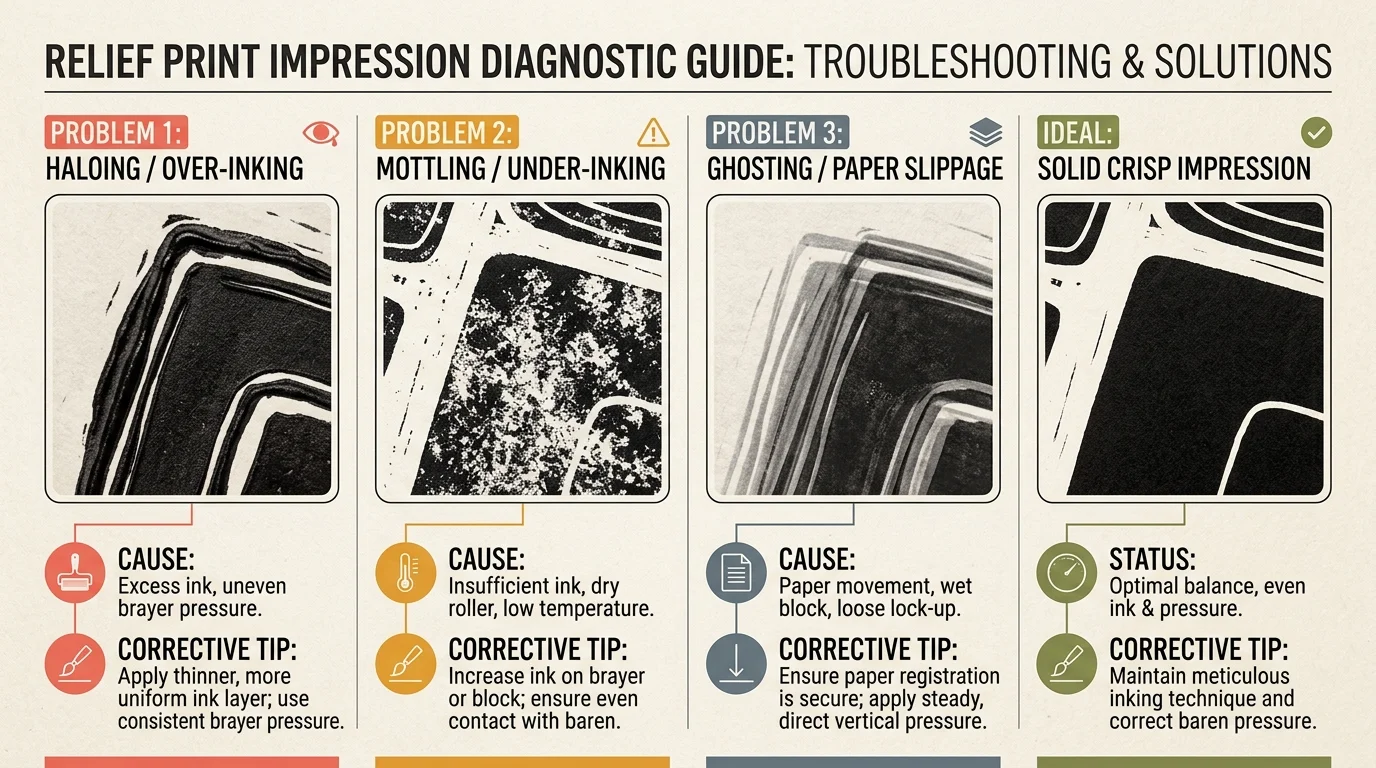
Every printmaker encounters minor visual flaws while refining their kitchen table workflow. Learning how to diagnose and correct these quirks quickly keeps your printing sessions joyful and productive.
Address these common printmaking defects using simple mechanical adjustments:
- Salt-and-Pepper Texture: The print displays faint white specks across solid color areas. Apply slightly more ink to your slab, or increase your downward baren pressure during burnishing.
- Squashed Edge Halos: Ink oozes outward past your carved lines, forming thick dark borders. You have over-inked the linoleum; clean your block and roll out a thinner ink film.
- Torn Surface Fibers: The print sticks to the linoleum and tears when peeled away. Your ink has dried too much on the block, or your paper is too fragile; switch to smooth Caligo oil ink or stronger Hosho paper.
- Layer Misalignment: The petals overlap the stem erratically. Re-tighten your jig stop battens and ensure your paper corners seat flush against the stops before burnishing.
- Brittle, Resistance to Carving: The linoleum chips rather than cutting in smooth ribbons. Warm the block face on your heating pad for two minutes to restore natural elasticity.
Keep a small project notebook near your printing station to record ink blends, paper types, and burnishing passes. These personal studio records ensure flawless results on every future print run.
Frequently Asked Questions
Can you carve linoleum safely if you have hand stiffness or mild arthritis?
Yes, by choosing mushroom-shaped palm tools and pre-warming your linoleum with a heating pad. Palm gouges transfer power from your shoulder and arm rather than requiring tight finger pinching, which dramatically reduces joint fatigue.
Why should I choose water-washable oil inks over standard acrylic block printing inks?
Water-washable oil inks remain wet on your inking slab for up to two hours, allowing leisurely printing without rushing. Acrylic inks dry in minutes, creating uneven, chalky coverage and risking torn paper during hand burnishing.
How do you clean linoleum blocks without ruining your kitchen sink?
Wipe the excess ink off your blocks onto scrap newsprint first using a dry rag. Then apply a few drops of liquid dish soap directly to the inked block, scrub with a soft brush, and rinse with warm tap water.
Do I need expensive Japanese handmade paper for my prints?
While Japanese papers like Hosho yield superior results under hand barens, you can start with affordable mulberry paper rolls or smooth lightweight sketch paper. Avoid heavy 300 gsm watercolor papers, which require high-pressure mechanical presses to transfer ink cleanly.
Disclaimer: This article is for informational and inspirational purposes. Life decisions are deeply personal, and we encourage readers to pursue their dreams while considering their unique circumstances, health, and financial situation.


1 Comment