
Lumbar spinal stenosis does not mean you must surrender your goal of crossing a 5K finish line at age 70. You can train safely without triggering neurogenic claudication or lower back flare-ups.
Stepping up to this athletic challenge is a powerful way of rekindling athletic passions and celebrating what your body can achieve.
Committing to an endurance walk despite spinal challenges is an extraordinary example of stepping outside your comfort zone in retirement to reclaim your vitality.
The secret lies in pairing Nordic-style backward pole planting angles with strict Zone 2 metabolic pacing to decompress your lumbar canal. This specific mechanical adjustment keeps your spinal facet joints open while propelling you forward.
By adopting this 12-week protocol, you protect your neural pathways, maintain upright posture, and build genuine endurance on your own terms.
Decompression Mechanics: Why Pole Angle Alleviates Stenosis
Lumbar spinal stenosis narrows the spinal canal and neural foramina, compressing nerve roots whenever your spine extends backward. Standard walking often forces an upright or slightly hyperextended posture that exacerbates lower back and leg pain.
Pairing this cardiovascular walking routine with targeted strength training for bone density can further reinforce the skeletal foundation supporting your spine.
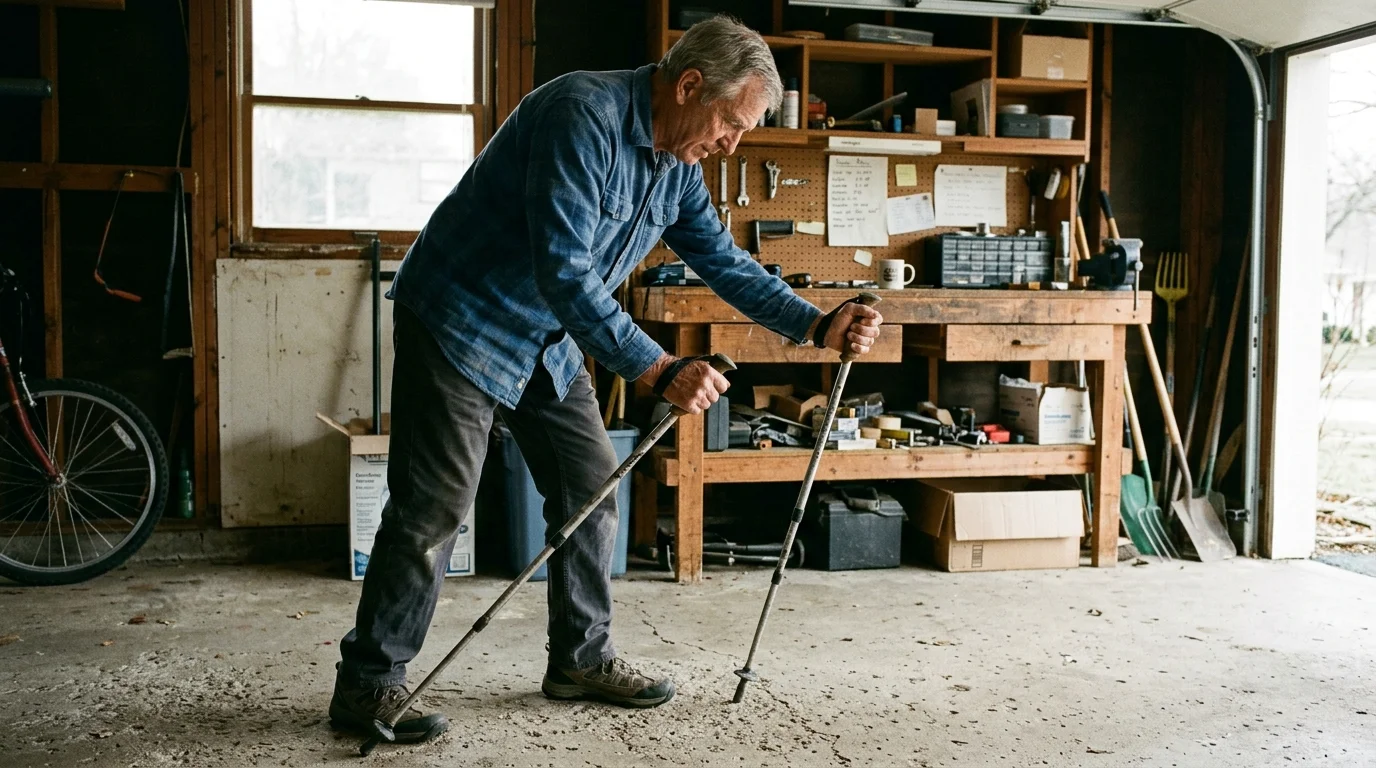
Using trekking poles introduces an external ground contact point that alters your body’s center of mass. By planting poles with a specific backward tilt, you create functional spinal decompression with every stride.
Set your pole planting angle between 45 and 60 degrees relative to the ground, angling backward behind your torso. This angle converts your arm drive into forward propulsion rather than upward vertical bounce.
Research analyzed by the Stanford Center on Longevity emphasizes that sustained physical mobility requires minimizing joint impact while preserving cardiovascular output. Angled poles achieve this by redirecting ground reaction forces away from your lumbar spine.
When you plant the pole tip behind your lead foot, you engage the latissimus dorsi and core musculature. This engagement stabilizes your pelvis and produces a mild, natural forward trunk lean of 5 to 7 degrees.
That subtle forward lean widens the cross-sectional area of your lumbar canal by up to 16 percent. Consequently, you walk without irritating the sciatic nerve roots or triggering neurogenic claudication.
Never plant your poles vertically in front of your toes like walking crutches. Vertical planting causes you to brake against the ground, shoving compressive forces directly back into your L3-S1 lumbar facet joints.
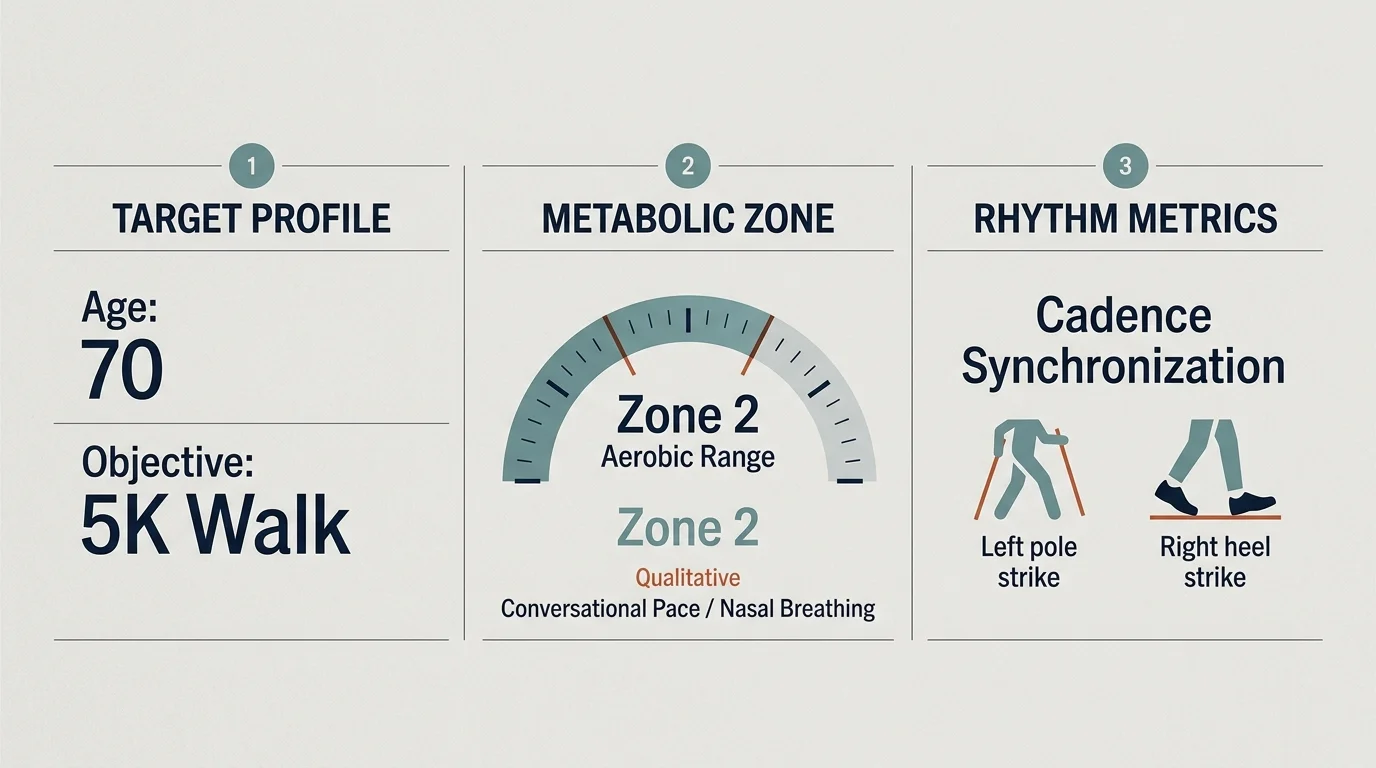
Focus instead on a rhythmic, alternating strike pattern where your left pole strikes synchronously with your right heel. Push firmly backward through the wrist strap until your hand extends past your hip.
Selecting Your Gear: Poles, Ferrules, and Footwear
Generic hiking sticks will not deliver the precise biomechanical offloading required for stenosis-safe training. You need dedicated fitness walking or Nordic poles with specific hand straps and tip attachments.
If you train alone on outdoor trails or neighborhood loops, integrating a reliable fall detection protocol adds invaluable peace of mind for every walk.
Similar pole setups and load-reduction techniques are equally essential if you are planning extended pilgrimages, such as walking Sarria to Santiago after joint replacement.
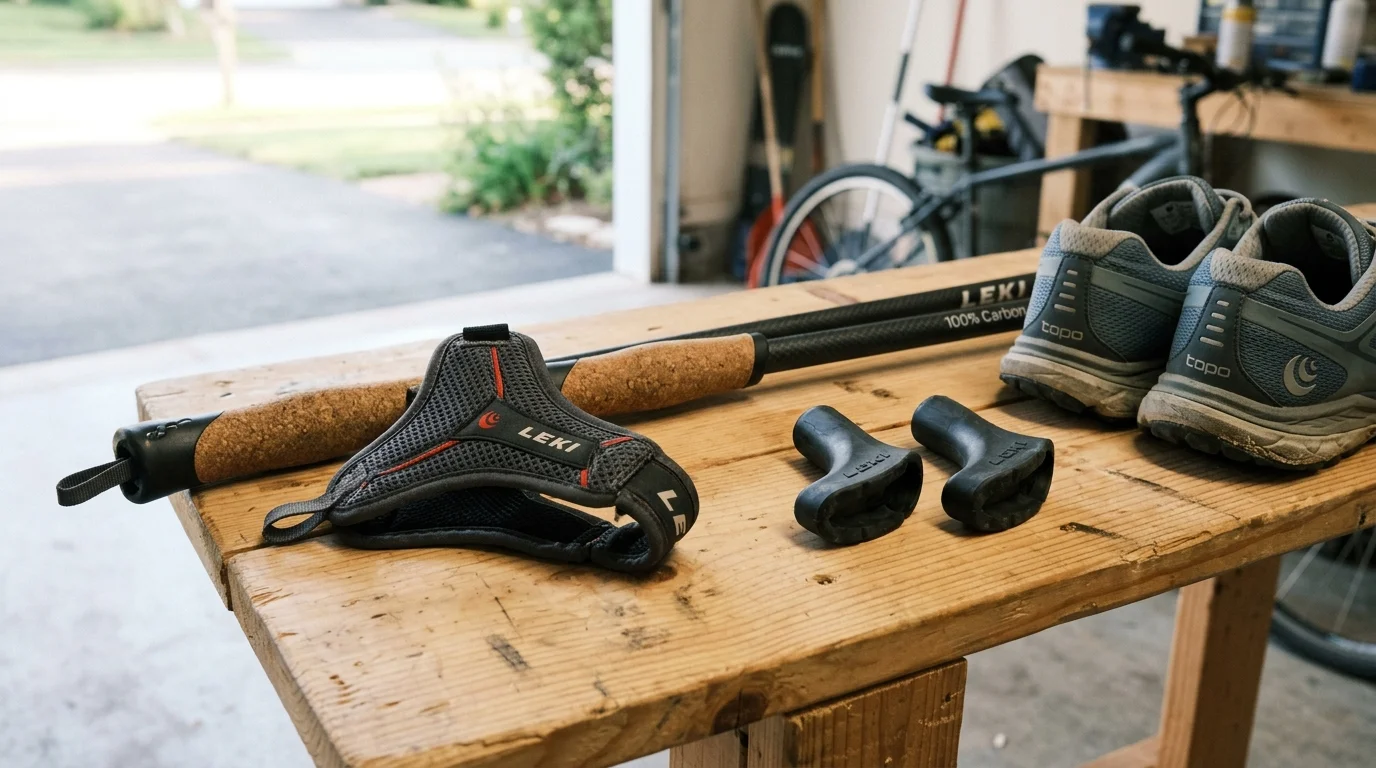
Select a pole model featuring an ergonomic trigger-loop mesh strap system, such as the LEKI Traveler Carbon or Black Diamond Trail Back. The wrap-around strap allows you to push through your palm without death-gripping the handle.
Death-gripping your poles spikes systemic blood pressure and tightens the trapezius and erector spinae muscles. A secure wrist harness lets you open your fingers on the backward swing, maintaining fluid circulation.
Equip your poles with angled rubber paw ferrules, also known as asphalt pads, for pavement training. These directional rubber pads grip smooth road surfaces firmly and absorb high-frequency vibrations before they reach your elbows and spine.
Adjust your pole height so your elbow forms a 90-degree angle when holding the grip with the tip resting beside your foot. For downhill training segments, lengthen the poles by 5 centimeters to prevent excessive forward bending.
Your footwear must complement your spinal alignment by eliminating unnatural heel lifts. Traditional running shoes feature a steep 10-millimeter to 12-millimeter heel-to-toe drop that tilts your pelvis forward.
Anterior pelvic tilt forces your lower back into hyperlordosis, closing the spinal canal instantly. Switch to a zero-drop or low-drop road shoe with balanced cushioning, such as the Altra Paradigm 7 or Topo Athletic Phantom 3.
These shoes promote a midfoot landing pattern that works synergistically with your backward pole strike. They disperse impact forces evenly across your lower extremities instead of concentrating force inside your lumbar vertebrae.
Zone 2 Physiology: Claudication-Free Cardiovascular Endurance
Training for a 5K with spinal stenosis requires you to build cardiovascular capacity without triggering vascular or neurogenic fatigue. Zone 2 training serves as your foundational physiological weapon.
Cultivating steady breath awareness during these rhythmic strides complements daily mindful meditation practices that reduce central nervous system tension.
Adopting low-intensity aerobic conditioning supports a broader approach to retirement wellness, protecting joint structures while enhancing day-to-day vitality.
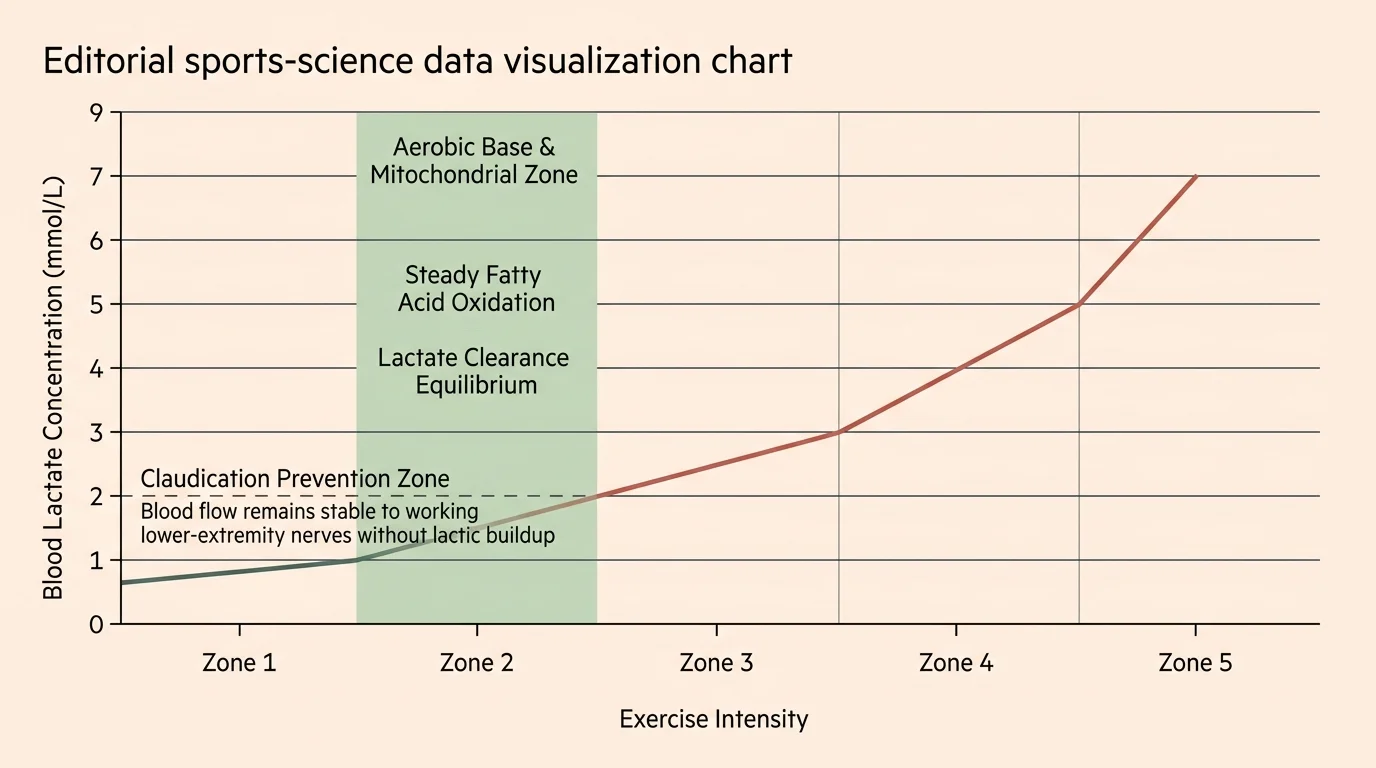
Zone 2 represents an aerobic intensity where your type-I slow-twitch muscle fibers derive energy almost entirely from fat oxidation. Blood lactate remains at baseline levels, typically between 1.5 and 2.0 millimoles per liter.
According to physical activity benchmarks outlined by the National Institute on Aging, sustained aerobic conditioning preserves functional independence and supports healthy metabolic function in older adults. Zone 2 exercise delivers these benefits without mechanical breakdown.
When you push past Zone 2 into higher cardiovascular zones, your body relies heavily on anaerobic glycolysis. This transition triggers lactic acid accumulation and rapid muscular fatigue throughout your postural stabilizing muscles.
As your deep core stabilizers fatigue, your posture collapses into extension or lateral sway. For a walker with spinal stenosis, this mechanical breakdown immediately pinches the narrowing neural pathways.
Zone 2 training also promotes microvascular capillarization around the nerve beds of your lower spinal cord. Enhanced capillary networks deliver oxygenated blood directly to compressed nerve roots, delaying claudication symptoms.
To verify that you remain inside Zone 2, use the talk test during every training session. You must be able to speak complete, multi-clause sentences aloud without gasping for breath.
If you find yourself speaking only single words or short phrases, your heart rate has drifted into Zone 3. Slow your cadence immediately or decrease pole push force until your breathing stabilizes.
Worked Example: Heart Rate and Cadence Targets for Age 70
Let us map out an exact cardiovascular and pacing prescription using a worked example for a 70-year-old walker. We will establish training boundaries using the Tanaka heart rate formula and cadence metrics.
Mastering sustainable walking pacing can even inspire active entrepreneurial ventures, such as launching an independent walking tour in your local historic district.
Establishing strict heart rate limits and cadence targets is also key when tackling active bucket list travel, such as visiting Machu Picchu at 70 with osteoarthritis.
First, calculate your estimated maximum heart rate using the validated formula: 208 minus (0.7 multiplied by your age). For a 70-year-old, multiply 0.7 by 70 to get 49, then subtract 49 from 208.
This calculation yields an estimated maximum heart rate of 159 beats per minute (bpm). Zone 2 is defined precisely as 65 percent to 72 percent of your maximum heart rate.
- Upper Zone 2 boundary: 159 bpm multiplied by 0.72 equals 114 bpm.
- Lower Zone 2 boundary: 159 bpm multiplied by 0.65 equals 103 bpm.
- Target Zone 2 training window: 103 to 114 bpm.
- Baseline resting heart rate (example): 68 bpm.
- Target cadence for spinal neutrality: 100 to 108 steps per minute.
Next, let us calculate the pacing required to finish a 5K (3.107 miles) comfortably within your physiological ceiling. We will target a sustainable race-walking pace of 19 minutes and 30 seconds per mile.
Multiply 19.5 minutes per mile by 3.107 miles to determine your exact total race duration. The math produces an estimated finish time of 60 minutes and 35 seconds.
At a steady cadence of 104 steps per minute, you will take approximately 6,300 total steps during the event. Maintaining your backward pole angle of 50 degrees ensures that each step unloads up to 20 percent of axial spinal compression.
During the race, monitor your chest strap heart rate monitor every 10 minutes to verify you remain below 114 bpm. If your heart rate hits 115 bpm, reduce your stride length by two inches while preserving your arm cadence.
This targeted mechanical adjustment drops your cardiac strain by 4 to 6 bpm within 90 seconds. You remain comfortably within your claudication-free aerobic performance zone.

The 12-Week Progressive 5K Training Schedule
This structured 12-week program builds volume incrementally to protect your lumbar spine against cumulative trauma. Follow the alternating schedule to provide adequate collagen recovery for your discs and ligaments.
Consistent outdoor morning training sessions also double as a natural circadian cue, helping to resolve early morning wakeups and improve sleep quality throughout recovery.
“It is never too late to be what you might have been.” — George Eliot
Phase 1: Biomechanical Adaptation and Technique (Weeks 1 to 4)
Focus entirely on learning your backward pole plant angle and keeping your heart rate inside your Zone 2 window. Do not worry about speed during these opening sessions.
- Week 1: Walk 1.2 miles on Monday, Wednesday, and Friday at 104 steps per minute; maintain heart rate between 103 and 114 bpm; rest on Tuesday, Thursday, and weekends.
- Week 2: Walk 1.5 miles on Monday, Wednesday, and Friday; complete 3 pole-release drills every half mile; keep heart rate below 114 bpm.
- Week 3: Walk 1.8 miles on Monday and Wednesday; increase Friday walk to 2.0 miles; maintain strict 45-degree backward pole plant angle.
- Week 4: Walk 2.0 miles on Monday, Wednesday, and Friday; complete continuous cadence checks using an audio metronome set to 104 beats per minute.
Phase 2: Aerobic Base and Volume Progression (Weeks 5 to 8)
During this intermediate phase, you will extend your endurance while monitoring spinal canal clearance. Introduce gentle rolling terrain to practice pole length adjustments.
As outdoor mileage expands, older adults who train unaccompanied should follow a solo aging safety protocol to ensure automated fall alerts are active on every route.
- Week 5: Walk 2.2 miles on Monday; 1.5 miles recovery on Wednesday; 2.5 miles on Saturday; verify your forward trunk lean stays at 5 to 7 degrees.
- Week 6: Walk 2.4 miles on Monday; 2.0 miles on Wednesday; 2.7 miles on Saturday; record heart rate recovery time immediately post-workout.
- Week 7: Walk 2.6 miles on Monday; 2.0 miles on Wednesday; 3.0 miles on Saturday; test your full race-day hydration pack and shoe setup.
- Week 8 (Deload): Walk 1.8 miles on Tuesday and Friday only; focus on deep diaphragmatic breathing and lower back decompression stretches.
Phase 3: Race Simulation and Peaking (Weeks 9 to 12)
Finalize your race execution by testing your sustained cadence and nutrition strategy over the full 3.1-mile distance. Refine your pacing discipline so you never cross your Zone 2 threshold.
- Week 9: Walk 2.8 miles on Monday; 2.0 miles on Wednesday; 3.1 miles (full 5K distance) on Saturday at 19:30 pace per mile.
- Week 10: Walk 3.0 miles on Monday; 2.2 miles on Wednesday; 3.25 miles on Saturday; practice passing maneuvers with poles close to your body.
- Week 11 (Taper): Walk 2.2 miles on Tuesday; 1.5 miles on Thursday; execute 10 minutes of backward pole push mechanics on level ground.
- Week 12 (Race Week): Walk 1.0 mile easy on Tuesday; 0.75 miles on Thursday; complete your 5K race walk on Saturday morning.
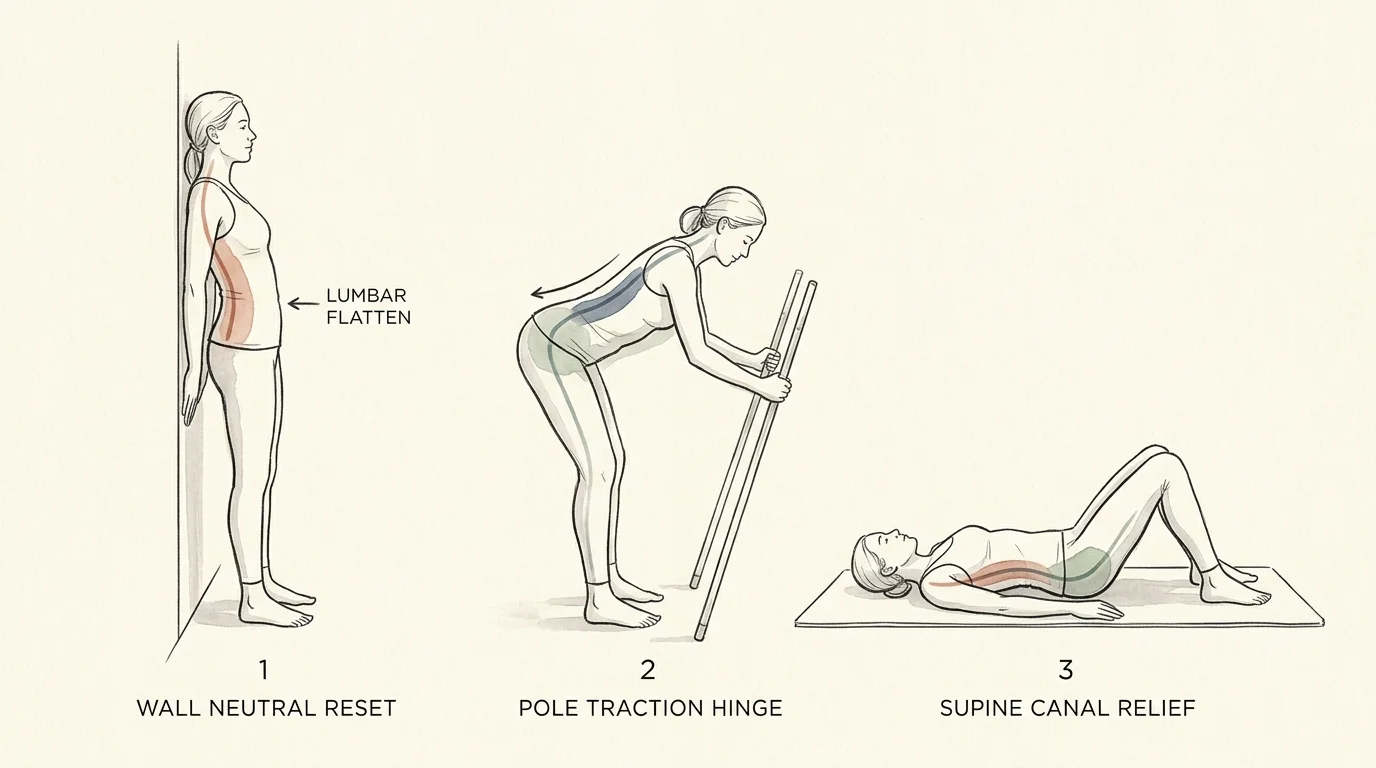
Recovery Splits and Lumbar Neutral Reset Drills
Your physical adaptation occurs between workouts, not during them. Walker athletes with lumbar stenosis must protect their neural tissue through dedicated positional decompression drills.
Never sit in an upholstered, slouched chair immediately following a training walk. Sitting in lumbar flexion while your muscles are warm forces excessive hydrostatic pressure into your intervertebral discs.
Perform the Psoas Gravity Reset drill within 15 minutes of completing every training walk. Lie flat on your back on a firm carpet or yoga mat with your calves resting on a chair or ottoman.
Ensure your knees and hips are bent at exact 90-degree angles. This passive position eliminates gravity-induced axial loading and immediately flattens your lumbar spine against the floor.
- Psoas Gravity Reset: Rest your legs on an ottoman at 90 degrees for 12 minutes to deactivate hip flexors.
- Standing Posterior Pelvic Tuck: Place your back against a wall; gently tuck your tailbone to flatten your lower back against the surface; hold for 5 seconds; complete 10 repetitions.
- Williams Flexion Hug: Lie on your back; gently draw both knees toward your chest until you feel a comfortable stretch along your lower spine; hold for 20 seconds; complete 4 repetitions.
- Active Hamstring Floss: Lie supine; hold the back of your right thigh; gently extend your knee upward while flexing your ankle; alternate 10 repetitions per leg.
Hydration plays an essential role in preserving your spinal canal volume. Your intervertebral discs consist largely of water, which slowly escapes during daily weight-bearing activities.
Drink 16 to 20 ounces of water containing balanced electrolytes within two hours before every walk. Maintaining optimal disc hydration cushions your vertebrae and prevents the narrowing of your lateral neural foramina.
Pole System Evaluation: Biomechanical and Load Metrics
Choosing the correct pole hardware dictates how much body weight you can transfer off your lumbar spine. Compare these proven systems across key physical and mechanical attributes.
| Pole Model | Shaft Material | Weight per Pair | Strap System | Axial Spine Offload |
|---|---|---|---|---|
| LEKI Flash Carbon Nordic | 70% Carbon Composite | 10.6 ounces | Trigger Shark 2.0 Mesh | 18% to 22% |
| Black Diamond Trail Pro Shock | 7075 Aluminum | 20.8 ounces | Padded Webbing Strap | 12% to 15% |
| Swix Quantum Six Fitness | 100% Carbon Fiber | 11.2 ounces | Just Click Clip System | 17% to 20% |
| Standard Twist-Lock Aluminum | 6061 Aluminum | 22.4 ounces | Basic Nylon Loop | 6% to 8% |
Carbon composite poles provide superior vibration dampening compared to aluminum models. The reduced vibration protects your wrists and cervical spine from repetitive micro-trauma during prolonged road walking.
Furthermore, trigger-release mesh straps offer superior leverage over standard nylon loops. They anchor the pole firmly against the base of your palm, allowing maximum power transfer on the backward propulsion stroke.

Race-Day Execution and Terrain Management
On race morning, arrive at the venue 45 minutes prior to start time to secure your gear and survey the course terrain. Line up toward the rear or outer edges of your starting corral.
Starting at the edge gives you sufficient lateral space to deploy your trekking poles without interfering with adjacent participants. Keep your pole tips angled backward and close to your hips during the crowded opening 400 meters.
Courses often present varying road gradients that affect your spinal alignment. Adjust your mechanics deliberately when transitioning between flat pavement, climbs, and descents.
- Uphill Gradients: Shorten your stride by 20 percent; increase your arm push through the straps; lean forward slightly from your ankles to open the spinal canal.
- Downhill Gradients: Shorten your poles by 2 inches or choke down on the grips; avoid leaning backward; land with soft, bent knees to absorb impact.
- Cambered Roadways: Walk along the flat crown of the road when safe to avoid lateral pelvic tilt, which narrows unilateral nerve exits.
- Aid Stations: Slow down to a steady march through water stations; avoid sudden pivoting motions that twist your lumbar spine under load.
Keep your eyes focused 15 to 20 feet ahead on the pavement rather than staring down at your toes. Looking forward preserves cervical neutrality and keeps your thoracic spine from slumping into kyphosis.
Trust your training and resist the urge to chase faster walkers who surge ahead during the first mile. Stick rigidly to your 104-cadence rhythm and keep your heart rate below your 114 bpm ceiling.
Crossing that 5K finish line validates your discipline, your biomechanical precision, and your commitment to an active lifestyle. You prove that spinal stenosis is an anatomical variable to manage—not a barrier to your dreams.
Frequently Asked Questions
Can I walk a 5K with spinal stenosis without using trekking poles?
While possible, walking long distances without poles increases axial compression across your lumbar vertebrae and facet joints. Trekking poles offload up to 20 percent of ground reaction forces, significantly reducing the likelihood of claudication flare-ups.
What should I do if my legs begin to feel heavy or numb during training?
Heaviness or tingling in your thighs or calves indicates neurogenic claudication caused by nerve root compression. Stop immediately, find a bench or curb, and sit leaning forward with your elbows on your knees for two minutes to widen the lumbar canal.
Are carbon fiber poles worth the extra cost over aluminum poles?
Yes, carbon fiber poles absorb ground strike vibrations far more effectively than rigid aluminum shafts. This dampening minimizes repetitive impact shock transmitted through your arms, shoulders, and upper spine over 6,000 steps.
How do I know if my forward lean is excessive while walking?
Your forward lean should originate from your ankles, not your waist, and should not exceed 5 to 7 degrees. If your lower back muscles feel strained or your neck aches from looking upward, you are bending too far forward at the hips.
Disclaimer: This article is for informational and inspirational purposes. Life decisions are deeply personal, and we encourage readers to pursue their dreams while considering their unique circumstances, health, and financial situation.